Monday, 9 February 2015

Off The Rails Scrapbooking January Tutorial- Paperbag Gift Bag.

I always forget my shopping bags when I go to the shops (here in South Australia we have to supply bags or get charged for plastic or paper bags), so I have accumulated quite a few paper bags over the last year. This Christmas I decided to make gift bags instead of using wrapping paper (they can be seen on my blog), here is my tutorial on my Paperbag Birthday Gift Bag version.


I started finding the products I needed:
 Stencils: Tim Holtz 'Arrows' and The Crafters Workshop 'Mini Kaleidoscope' .
Stamps: Prima rectangular stitching, Alphabet blocks brought from Lincraft and 'Season' from Kaszazz.
 Mont Marte Modelling paste
A selection of scrap and 6"x6" papers: Kaisercraft 'Kaleidoscope' and 'Random' Crate Paper Co
Ranger Glossy Accents
Staz On Jet Black Ink pad
Dylusions Ink Sprays: Lemon Zest, Bubblegum Pink and Crushed Grape. White Linen and Black Marble.
Distress Inks: Antique Photo, Black Soot and Peeled Paint.
and of course 
a paper bag.


Using the Dylusions spray inks I randomly sprayed ink over the 'mini kaleidoscope' stencil which I had placed on the top right hand part of the paper bag. I removed the stencil carefully and dried the ink with a heat gun. Replacing the stencil slightly off centre to the previous position I spread modeling paste over the stencil this time.


I chose a range of papers from my 6"x6" paper pads from Kaisercraft 'Kaleidoscope' and Crate Paper Co. 'Random Collection' and die cuts from one of the Kaisercraft collection and tearing pieces layered them using magic mount to raise the bird, 'love' die cut and words to give more depth and dimension.
I also used black and white cotton twine to frame the words. and curved the butterfly's wings to give it more dimension


Using the 'Peeled paint' distress ink to add colour to the modeling paste and with the 'mini kaleidoscope' stencil to add to the background behind the layered papers. I used the 'Antique Photo' to edge the layered papers section.


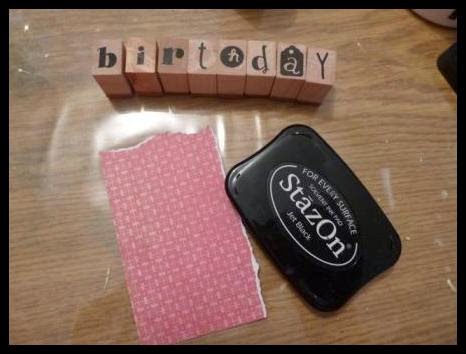
Using the wood block stamps I stamped 'Happy Birthday'  with Staz On onto torn pieces of the pink paper I had used on the layered section and edged it with 'antique photo'


I used the Tim Holtz 'Arrows' stencil and Distress ink 'Black Soot' to add chevron arrows to the background, also used the smallest 'rectangular stitching' stamp and Staz On and the 'season' Kaszazz stamp to add more depth. I place some black cotton on the bag under the layered paper and after gluing the paper down I splattered the 'Bubblegum Pink', 'Black Marble' and 'White Linen' to finish the bag.


Hope you enjoyed reading my Paperbag Gift Bag tutorial for Off The Rails Scrapbooking. Next time you get a brown paper bag have a try in making an unique gift bag for a friend or family member or maybe you can think of another way to re-use a paperbag.

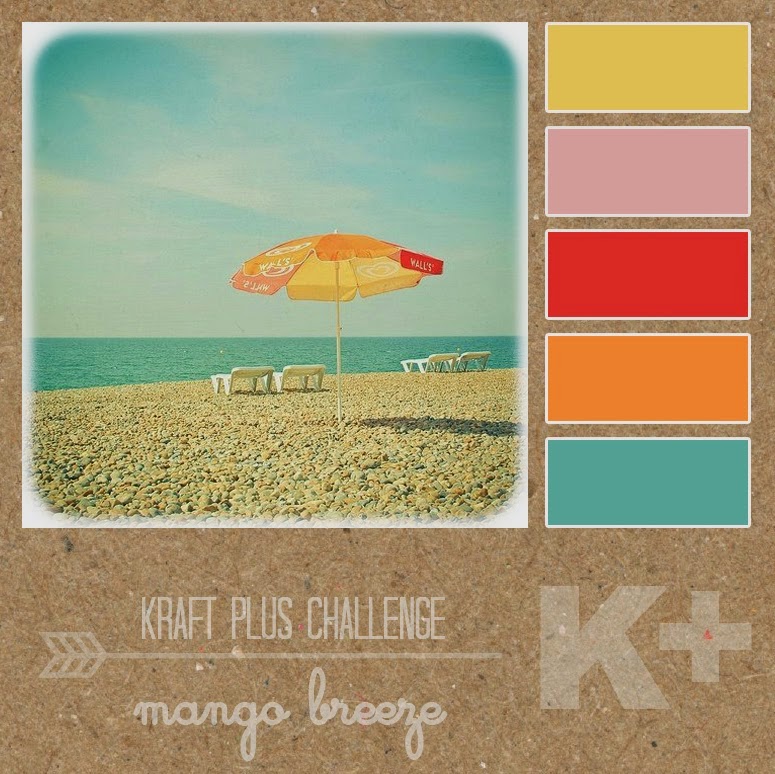


Kraft Plus Challenge February 2015

Well after being inspired by Fiona and the other inspirational artists at Kraft Plus I though I'd go out of my comfort zone and use Kraft paper. I loved the colours of the this months Challenge so thought I'd give it a try.


kraftplus  February-challenge-mango-breeze


I live in South Australia and am very lucky to have my family 30 mins up the road. My handsome grandson Zander loves to explore the computer as I am Skyping him, his sister Imi and my daughter Bel and quite often we can't see each other because of the right buttons he always seems to push.LOL. Even living close we talk and visit regularly but it's great to talk to them face to face whenever we want to, I love Skype. 

Now to my layout:

List of items that I used included:
Kaisercraft Patterns Kraft the flip side of  'Lace' Mix + Match Collection and Rub Ons- 100% Boy.
13arts- Ayeeda paint Matte yellow, green and coral.
Chippies- hearts/arrows 'Crazy Arrows' 2Crafty Chipboard
Stencils: Coffee splotch from 'Crafters workshop' 
Heidi Swapp- Little heart sticker
Random alpha stickers from the stash.
I made my own circle stencils
Black cotton
Word Stamp from Tim Holtz
Mont Marte Modelling paste and impasto texture paste.

I used the Impasto paste as a sealant over the Kraft paper to minimise the curling of the paper when I used mixed media and to ensure the brightness of the paint colours and not have them absorb into the paper and possible become washed out or bleed unevenly on the paper. 

Mixing paint into some modeling paste and using my homemade stencils I placed a selection of circles of different colours in a curve down one side and one on the opposite side in the lower corner.

In the large one I placed the heart arrow chippie onto the paper (with the large circle stencil over top) and then placed medium over it so when removed the imprint was left in the circle. 


In two sections I clumped together random  letter and number  alpha stickers.  When the circles were dry I used an Ultra fine black Sharpie to doodle around the circles and draw small circles between the coloured ones, trace around the alphas ( I removed a few to add more dimension) and around the heart arrow in the large circle.

I use a Tim Holtz word stamp and Staz On Black Ink to stamp sections around the circles. I painted chippy arrows and heart to add to my page and added the Heidi Swapp hear, cotton and twine under the photo and large chippy arrow. Finally placing the '100% boy' rub on to finish the layout.


I enjoyed challenging myself in working with Kraft paper and stepping out of my comfort zone. Thanks for coming over and checking out my new post and head over to the Kraft Plus Blog and check out the amazing design team and the entries. Hope I've inspired you to step out of your comfort zone and join in with this or other challenges.


Thursday, 1 January 2015

Off The Rails Scrapbooking January 2015 Inspiration

A new year and the Off The Rails Scrapbooking January Mood Board was an amazing way to start my scrapbooking year and a big thankyou 2Crafty Chipboard for being our sponsors for this challenge.


https://www.2crafty.com.au/stockist.php

My favourite place to be in summer is down the beach, especially on those hot days where you can spend the whole day swimming, kayaking, reading and walking ;exploring the amazing eco-environments including rock pools and sand dunes finishing the day watching the sun set.


Firstly I sprayed Tim Holz distress Inks spray 'Lemon Zest' heavily in several places at the top of my page, letting it dripple down the page and then sprayed 'White Linen' over the top so that it followed the yellow ink giving it a softer look. Using an old stencil I obtained from a local hardware store when I was painting my daughters in a sea theme about 15yrs, I added modelling paste shells over the dried paint. 


I looked through my scrap paper and found a selection of yellow card and paper and some chevron black and white to layer behind my beach sunset photo. Before gluing the layers down I used one of my Kaszazz 'Season' stamps with StazOn black Ink, and placed down some black cotton. 
Other elements I used to finish off my layout included yellow and white cotton twine and more black cotton around the photo, rubbed on some Rub Ons from 2 different Kaisercraft sets that I brought years ago and splattered Tim Holtz Ink sprays 'White Linen', 'Black Marble' and 'Lemon Zest' over the page. 

Hope Off The Rails Scrapbooking and  I have inspired you to take on the challenge of exploring different colour combinations and take inspiration from mine and others from our amazing mood boards each month. And another big thankyou to 2Crafty Chipboard for sponsoring this challenge.

Tuesday, 9 December 2014

Xmas Bags- Off the Rails Scrapbooking tutorial

In South Australia we are encouraged to take our own shopping bags when grocery shopping , but I forget mine more often than I should so I'm charged for one if I need it . At one of my supermarket they use paper bags instead of plastic, so as I seem to have accumulated quite a few over the year so I thought I'd re-use and recycle them to put my Christmas presents in.


Some of the items that I planned to use:
Paper bag
Assorted Washi Tape
Gesso
Modelling paste
Water colours and water filled paint brush
Rub Ons- Kaisercraft
Dylusions Ink Sprays; White Linen, Postbox Red, Chopped Pesto
Honey comb stencil- Kaszazz
Kaisercraft collection- Yuletide, St Nicholas
Assorted stamps from Kaszazz and Stamp It Up
Bling.

I started with laying the stencil down on the bag and spraying 'Postbox Red' Dylusions spray and dried it with a heat gun before adding two sections of modelling paste over the stencil which I'd set slightly off from the previous application. 


I then stacked/layered several torn pieces of Kaisercraft papers on top of each other and then added one of the pre-cut dies from the back of the pack (using magic mount tape to give it height). 

After gluing it onto the bag I used water colours around the edges of the papers to soften and blend it with the background more.


I used a range of stamps and rub ons and added some bling and red/green cotton twine with black sewing cotton behind the die cut. To finish off I added splatters of the 3 coloured inks over the bag.


  I was so pleased with how it turned out I experimented with the same resources in similar and different ways.


 Hope I have inspired you to have a try at re-using and recycling this Christmas season. Merry Christmas and hope you all have a great time with family and friends this Christmas. Thanks for joining me and Off the Rail Scrapbooking.


Saturday, 8 November 2014

Card for a new mum or a mums birthday

A friend of mine has just had a wonderful addition to their family so I thought I'd make her a very special card.


 My card stock was from Kaszazz and edged with Tim Holtz Distress Inks (Antique Linen, Stormy Sky, Iced spruce). The paper was from Kaisercraft 6x6 paper pad 'Kaleidoscope'  with its edges distressed and torn. I used Dylusions Ink spray (Bubblegum Pink, Vibrant Turquoise, White Linen) and Distress Ink stain (Spiced Marmalade) using painting, splattering and rubbing. In the top corner I placed a beautiful rubon quote from Kaisercraft (English Rose). The flowers I added were from Prima, Kaisercraft and Tappy Toppers with the butterflies brought from our local coastal shop in Beachport -Coastal Treasures.


Thanks for coming and seeing my latest card and hope you have enjoyed visiting Off The Rails Scrapbooking and if you haven't visited us there yet pop over and see the amazing artists and their work.

Tuesday, 4 November 2014

Off The Rails Scrapbooking November Mood Palette Inspiration.

The Mood Palette for November is bright and vibrant and was alot of fun to do although I'm not used to using such vibrant colours. This is what I created, hope you like it as much as I do.
This layout is dedicated to my amazing friend who lost her battle with cancer this year, like this mood board she loved bright colours and had a vibrant personality and outlook to life.


 Background:  Dylusion Inks spray and splatters: Green Lime, Lemon Zest, Crushed Grapes, White Linen.
Tim Holtz Distress Stain: Spiced Marmalade.
Stamping: Kaszazz 'Texture Block' and a Prima Finnabair clear stamp
Mont Marte Modelling paste mixed with Spiced Marmalade stain using a Finnabair Prima stencil.
Washi Tape with colour added Crushed Grape and Spiced Marmalade ink and stain.

Photo backing paper: Kaisercraft 6"x6" paper pad 'Kaleidoscope'
Tags and messages: Kaisercraft collections 'Curiousity', 'Collectables' and 'Kaleidoscope'.
Tim Holtz Distress Ink 'Squeezed Lemonade'

Embellishments and Flowers: 
Flowers: Prima, Kaisercraft (white- coloured with distress ink and stain)
Cotton Crocheted Doilies: Kaisercraft
 Embellishments: enamel braz from my stash
Alphabet letters; covered with gesso then 'Crushed Grape' Dylusion ink
Dymo mini labeller.`
Bright yellow Chiffon material


 Thanks for dropping by and hope you have popped over to Off the Rails Scrapbooking and checked all the other fantastic layouts. Look forward to seeing your creations in our challenges, current and future.

Sunday, 2 November 2014

Scrap It With Attitude Nov Red and Green

 I was lucky to become a Nanny to my second grandchild just before last christmas and this coming year will be amazing with them staying over Christmas Eve to share the magic of christmas morning. 


 Items used on this layout include:
Dylusions Ink Spray: Postbox Red, Cut Grass
Distress Ink Tim Holtz: Barn door, Evergreen bough
Stencil: Finnabair Prima

Monte Marte Modelling paste
Kaiser craft 12"x12" (scraps), 6"x6" Card pad - paper and tags
Bauble stamp & December Stamp from Kaszazz
StazOn black ink pad
Washi Tape- assorted
Chevron arrows from Studio Calico

Thanks for dropping by to have a look at my latest layout for SCRAP IT WITH ATTITUDE.