Over the last couple of years I have as you possible have or are, collecting lots of scrapbooking magazines. So instead of having boring plain magazine holders I thought why not scrap them too.
Here is Septembers Off The Rails Scrapbooking Mood Board which is sponsored by the amazing Chipboard company 2Crafty
Items I used:
- Blank white magazine holders from Ikea (pkt of 4).
- Black gesso- Monte Marte
- 12" x 12" paper of choice; mine was from my old stash (Crafty Kids now known as Kaszazz)
- 2Crafty Chipboard 'Square collage panel'
- TCW Rebekah Meir designs 6" x 6" mini Labyrinth stencil
- Semco Acrylic black and white paint.
- Monte Marte Modeling paste
- StazOn Black Ink
- Tinby Metallic Melts 'Glistening Snow'
- 'Funky tree' and small Feather stamps; Kaszazz
- Black and red card Stock; Kaszazz
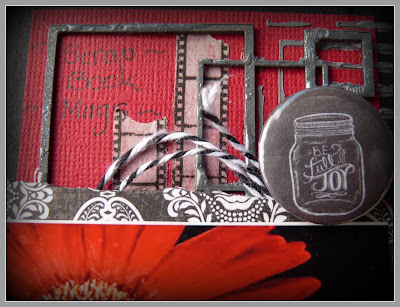
- Black and white twine
- Funky Flair 'Jar of Joy'
- Kaisercraft 'Outdoor trail' 6" x 6" paper pad; The stag and paper that the feather was stamped on.
- Tim Holtz Distress Ink 'Black Soot'
1. Firstly I assembled the flat pack cardboard magazine holder.
 2. Use the box as a template to transfer its shape onto the paper you wish to cover the sides and front with.
3.Using Black Gesso paint the edges and the back of the magazine holder.
4. Waiting for it to be completely dry.
 5. Glue the paper onto the holder with the join in the front. (This will be covered)
6. Blend upper and lower edges with 'Black Soot' Distress Ink, you can also at this stage paint the inside of the box black.
7. Cut a piece of black card slightly smaller than the front panel of the holder and then cut a red one smaller than the black card. Use double sided tape to join them together.

8. Mix black and white acrylic paint together to make a shade of grey darker than you need then add some modeling paste, this will lighten the colour.

9. Using a spatula and the stencil add the grey modeling paste to one side of the new panel piece.

10. Cut up the 2Crafty panel to achieve the shape that you want. Mixing some more grey paint, cover the pieces with paint and then sprinkle Metalic Melts over it. Use a heat gun melt the Melts, if you need to add more Melts cover the pieces with embossing distress ink first before sprinkling on more melts and using the heat gun again. This is the beauty of these embossing powders; it can be heated more than once which can lead to layering of colours if you wish.

11. Using StazOn to stamp a tree onto the opposite side of the panel on the lower corner. I stamped another onto some black card and cut out whilst I could still see the out line before it dried. I also printed a feather onto some paper I found that had stags and outdoor contour patterns on it. I cut out the feather and the stag to add to my panel.
12. Now play around with the placement of your photo (mine was chosen from the mood palette) and layering papers, twine, stag, feather and funky flair (which had chosen because of the jar in the mood palette) and glue then in place.
13. I added a few words onto the background, you may chose to use a word/text background stamp.
14. Glue panel onto the magazine holder and fill with your favourite magazines.
Below are some closeups for you to see, the flower in the photo has come out more orange than red which I'm disappointed with but you will get the idea.
Thanks to dropping by to check out my latest tutorial, hope you enjoyed it and be sure to pop back to see the other amazing pieces of art from the Off The Rails Scrapbooking Design Team and of course the fantastic entries as the month goes by.


No comments:
Post a Comment