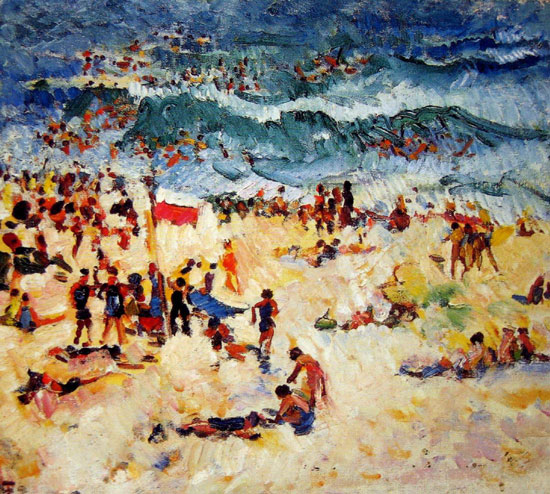
Sunday 31 January 2016

Beach Escape- ARTastic Summer Challenge.

JANUARY inspiration is Bondi Scene by Isabelle May Tweddle.

ARTastic JANUARY inspiration is

 Bondi Scene by Isabelle May Tweddle.


I love' Summer', hot weather, swimming or just sitting down on the beach taking in the peace and quiet. Blue skies, white sand and good friends is the perfect combo on a summers day. I thought that using the watercolours would be perfect for this layout and the colours are chosen from the colours of our beautiful local sea at Beachport in Sth Australia.


Items I used to create this layout included:
  • 12" x 12" white card.
  • Kaisercraft chipboard letters.
  • Pages from an old book torn into small pieces.
  • Mont Marte Impasto to seal paper and glue paper over lettering.
  •  White gesso
  • Watercolour palette paints with high pigmentation (Brighter and vibrant colours)
  • Black acrylic paint 
  • Finnabair Mica Paints 'Pink' 
  • Kaisercraft collection 'Sandy Toes'
  • Sharpie pen for border and sketching around letters.
  • White cotton


 Thanks for popping over to see my entry in the ARTastic January Challenge. Hope you keep re-visiting my blog to see what I create next.

Scrapping Buddies- Scrap the Girls Jan Challenge.

I love this photo, Fiona and I going shopping for supplies to spend the evening enjoying our creativity and friendship together.


 Items used: 
  • 12" x 12" White Card Stock
  • Monte Marte Modeling Paste
  • Monte Marte Black Gesso
  • Kaisercraft 6 1/2" paper pad asssorted papers and dies from the 'Take Note' collection
  • Kaisercraft, Little Birdie and Prima flowers
  • Funky flairs 'Create' flair
  • Tim Holtz stencil 'Treads'
  • Brass elements
  • Black and white cotton twine
  • Kaisercraft script stamp
  • Old antique lace from my Nan's lace stash box.
  • Black Sharpie pen
  • Acyrlic paints; for grey shadowing and paint splats.


Thanks for dropping by and checking out my latest challenge entry for 'Scrap The Girls'.


Tuesday 26 January 2016

White with Treetop Challenge- Treasuring Fun Together


Over the last year my husband and I have rekindled our love of geocaching. Armed with our GPS we travel around both interstate, in our state and our own community learning about new places, old places and places we didn't even realise existed; finding wonderful treasures along the way. There are so many caches out there and range from easy to very creative and difficult. We've climbed up cliffs, up mountain tracks, over rocks and into tree tops so I thought the beautiful 'treetop' green was perfect to use to create this layout.


Items I used included:
  • White 12"x12" card stock
  • Ranger Multi Medum Matte- to seal paper before adding paint.
  • DecoArt Media White crackle paint - painted onto the Imaginarium 'Thistle's board'
  • Imaginarium 'Thistle's board'
  • Paint used was Semco Acylic paints and Lindy Stamp Gang 'Starburst Color Shot'
  • Black  and white paper from my stash
  • StazOn black
  • Prima 'White Wire Thread'
  • Chipboard- small people, brackets and hash tags from my stash.
  • Mont Marte Black Gesso 
  • Donna Downey 'Painted Flowers' stencil
  • Indigo Blue 'Limor Circles' stamps
  • Feathers collected on one of our geocaching searches.
  • Black permanent ink pen - fine 
  • Black cotton


Closeups:


Hope you enjoyed looking at my latest layout and will drop back to see what else I have done.


Monday 25 January 2016

Off the Rails Scrapbooking- January Mood Board Tutorial

Making cards is an great opportunity to practice techniques and experiment with a range of product and at the end you have a special and unique card to give to your friends and family. Here is a quick card that I made within half an hour with a technique my amazing scrapbooking and camping buddy Fiona Paltridge showed me in a layout workshop early last year. I love taking any opportunity to attend workshops and events where I can learn and be inspired by fellow scrapbooking and card makers.
This is my take on the Off The Rails Scrapbooking January Challenge Mood Board and I would also like to take the opportunity to thank Narelle from Simply Stamping for sponsoring this month challenge. I didn't get a chance to order any any up to date Stampin' Up stamps but I did have some that I had purchased a while ago so jump over to Narelle's website and see the amazing new products she has available to purchase, I know I will be getting some soon.

www.offtherailsscrapbooking.blogspot.com.au
Off The Rail Scrapbooking January Mood Board

January Challenge Sponsor.


Items used include:
  • 1 piece White 'Card' stock
  • 1pc of scrap white card to stamp onto.
  • Stampin'Up 'Friend' stamp from 'Looks like Spring' set.
  • 'Enjoy the Little Things' 12"x 12" paper
  • Deep red card- small piece to be torn to back Friend stamp.
  • Ranger 'Glossy Accents'
  • A range of washi tapes in different colour and patterns
  • White gesso
  • IndigoBlu 'Ink splat' stamp set 
  • Black StazOn Ink
  • Black leather strapping
  • Coloured beads
  • Large Pattern Button.
  • Wet Ones 
  • Magic mount from Kazass, if you haven't go Magic Mount small pieces of cardboard from a box will do the same thing.


Step 1. Fold card stock in half and crease edge to make lay flat.

Step 2. Cut a piece from the 12"x12" paper to fit onto the front of the card leaving a small white border.


Step 3. Choose a colour washi tape and begin tearing strips of washi tape off the roll, continue to tear each piece into thinner strips and lay onto one of the long edges of the card in random places, overlapping the pieces and repeat this technique in a small area on the bottom right hand corner.  Repeat this with the other colours and patterned washi tape until you are happy with the effect.


Step 4. Placing small amounts of white gesso on your finger, smear the gesso over the tape and just over the tape edge in a gentle rubbing motion. Using a wet one wipe off excess and in areas that you want to see the patterns and colours more and to soften the edge of tape where it joins with paper. Do each of the areas separately to ensure the gesso doesn't dry too much.


Step 5. As it dries you can  stamp the 'Friend' stamp onto the scrap white card stock with Black Staz On ink and cut it out.

Step 6. Tear a piece of red card to fit behind the stamp, place a magic mount behind cut out stamp and stick to red card.

Step 7. Thread the beads and button onto the strapping.

Step 8. Using Black Staz On ink and 'ink splat' stamp, stamp your splats where you think they would look the best to balance the look of your card.


Step 9. Glue on your bead/button strap with a strong glue like 'Glossy Accents'. I placed some magic mount under my button to hold it in the place and flat. And glue 'Friend' stack down onto the small tape area.


Step 10. Edge the card with Black Staz On Ink to finish the card.


Here are some closeups for you:


Hope you enjoyed this tutorial and pop over to the Off The Rails Scrapbooking page and check out more pieces that will inspire you to have a go at scrapbooking, card making and hopefully to enter our latest and future challenges. 

I can't leave without a big thank you to Fiona Paltridge for inspiring this piece with her technique she taught me  you can visit her by visiting her at Pastiche Scrapbook Studio.


Friday 15 January 2016

Off The Rails Scrapbooking Design Inspiration- January Challenge.

As children we were lucky to spend our time with our family traveling around, we loved playgrounds, the beach, rock pools and forests. Going through some of my families old photography slides ( for those who remember what they were lol) and scanning them into the computer I found some wonderful summer holiday moments with my family that I'd forgotten. So I thought the colours and vibrancy of the fun we were having back in the 'old 60's days' (maybe early 70's) in these photos would be great to use in this challenge. I especially love the photo of my mum, us kids and my Nana who was standing on the end making the swing go higher and higher whilst still holding her handbag.

Anyway putting the reminiscing on the back burner for a minute, I hope I inspire you to have a bit of fun with this wonderful mood board and give our challenge a try.


Off The Rails Scrapbooking January Mood Board.


Thanks to our January Sponsor
Online Store


Items I used included:
  • Kaisercraft 6 1/2" paper pad 'Curiosity'
  • Kaisercraft 12"x12"- Bow and Arrow Collection
  • Bella Krafty goodness Paper 'Chatterbox' for words.
  • 12"x12" Mint texture and patterned scalloped edged paper from my stash
  • Glitz 12"x12" paper pad
  • Stamping up - Ornamental keepsake stamp
  • White Gesso. 
  • Assorted washi tape from stash 
  •  Studio Calico- Cork arrow and chevron set
  • AC thickers- chipboard letter stickers.
  • StazOn Black Ink
  • Prima black wire thread
  • Kaisercraft stamp - Arty
  • Indigo blu stamp set 'Ink Splat'
  • 'Stormy Sky' Tim Holtz Distress Ink.
  • Piece of natural Hessian
  • Pieces of cardboard and magic mount tape to lift photos.
  • Funky Flair- camera


This is how I constructed my page:

The Background:  
  • Glue the  Scalloped edged Patterned paper to the  Mint textured 12"x12" paper.
  • Cut a strip from the 'Bow and Arrows' paper and glue across the top 3rd of page.
  • Using a spatula add White Gesso to the edges and different sections of the paper, using a WetOne to remove or thin out areas if you need to.
Next layer:
  • Add strips of washi tape
  • Tear pieces of paper from the 6 1/2" paper pad and Glitz 12"x 12" paper pad.
  •  Distress a square piece of hessian that is a bit bigger than the photo you are going to use.
  • Cut the title of the word paper and edge it with Staz On. Then place 3 pieces of Magic Mount on the back in preparation to add height to page and so title doesn't get lost in the layers.
Photographs:
  • Cut out photos One large than the other 2 leaving a small white border.
  • Edge each with StazOn Black ink.
  • Glue a small piece of cardboard box to back of large and one of the small photos. 
Beginning of the Assembling:
  • Experiment with the placement of each paper and hessian. Take a photo with your camera so you can remember where they were if necessary.
Stamping:
  • Stamp on some white card 3x Stampin' Up 'Ornamental'  stamp. Narelle at Stampin' Up have some amazing stamps and product you can check out on the link above, check it out.
  • Paint with the watercolour colour you want to bring out of your photo. For me it was the red of the swing frame.
  • Cut out the stamped pattern leaving a small border.
  • Using the Ink splats stamp and Staz On ink add splats top and bottom of washi tape
  • When you have an idea where you are going to place your photos stamp the Arty stamp with StazOn under the photo so it shows on the outside of the photo to soften the edges.

 Completing Assembly:
  • Glue layers on where you want them, use photo on the camera if necessary.
  • After hessian is added, paint some white gesso on it to soften and blend the material more with the background.
  • Make circular frame with black wire thread on top of the hessian and add the large photo on top. 
  • Add other photos
  • Add cork chevrons, some were coloured with distress 'Stormy Sky'
  • Add thickers to make the word you want for the main title 'Family' was my choice.
  • Add small title and camera flair.
  • Finish off with splats of watercolour; black, orange, red and white.


Thanks for popping over and checking out my blog and latest inspiration piece for Off The Rails Scrapbooking. Hope you join in with our January Challenge and look forward to seeing your take on our take of our mood board.


Friday 1 January 2016

Scrapbooking Top 50 DT - January Challenge Inspiration


Welcome to my Scrapbooking Top 50 Australia Design Team Inspiration layout. The sketch for the January Challenge is one that inspires us to add and experiment with layering. I chose a small photo of myself as a child to put on my layout. As I work with children in our local long day care centre when I found it, it made me think of how my parents made me feel as I was growing up and that how I was brought up had such a huge impact in my life. This inspired me to search for the right quote to put on my page and thanks to Pinterest I found just the right one "The way we talk to our children becomes their inner voice". - 'Peggy O'Mara' and this is what I created using this months sketch.


Scrapbooking Top 50 Australia
Thanks to our January Sponsor.


Items I used included:
  • Kaisercraft paper 12"x 12" from my stash
  • Burdy embellies: heart. 
  • 'Stormy sky' Tim Holtz Distress Ink
  • Kaisercraft 6 1/2" paper pad 'Sweet Nothings'
  • Kaisercraft 'Curiosity' collection die cut set.
  • Ornamental frame - Merci
  • Round Scroll work and metal button embellishment
  • White cotton
  • Coloured thick wool/thread
  • White Gesso
  • Wet Ones
  • Watercolour paints
  • Prima white wire thread
  • Skeleton Leaves- Molli and Mimi
  • Flowers- little Birdie (Boutique and Classic Elements) and Kaisercraft
  • StazOn Black
  • White cheesecloth
  • Fineliners pens by Kaszazz
  • Imaginarium 'Everyday' and Kaszazz 'Believe' chipboard words.


Heart:
  • Edge the heart with StazOn Ink 
  • Then use Stormy Sky ink to blend around edges
  • Tie some matching thick twine or wool through holes.

Background:
  • Paint White Gesso over the whole 12"x12" patterned paper
  • Using a Wet One wipe off some of the gesso, this softens the colours of the patterns on the central area of the paper and the edges a more delicate effect.
Frame:
  • Using White Gesso paint over the frame and leave to dry
  • When dry chose the watercolour that is a deeper tone of the background paper and carefully paint over the gesso. If you work it too much the gesso with start to blend and move into the paint. You may like this effect I did as it let the diamonds show through.
  • Leave to dry.
  • When dry cut photo of your choice to size and then stick it to the back of frame.  
Layers:
  • Chose the colours and patterns of the die cuts from the 6 1/2" paper pad for paper layers and cutting out flowers from paper like I did.
  • Chose the assorted flowers and leaves that you feel suit the paper and style you envision. 
  • Find other embellishments that you feel will suit, I chose an acrylic button style embellishment with scrolls on it and metal button.
  • Experiment with the placement of the papers, frame, flowers, leaves and embellishments, taking a photo on you camera or phone so that you remember where they belong or several versions so you can review which one you like the best.
  • Wind wire thread into the shape of the frame and curl the ends up/down to add dimension. 
  • Cut a piece of cheese cloth to fit behind frame, distress the edges, spray with water and then paint with a matching watercolour paint to the frame leaving some white to soften the effect.
  • On a journaling die cut add the quote using a fineliner pen. 
  • Paint the chipboard words with White Gesso. I experimented with different colours starting with white, stormy blue then ended using Staz On Black Ink, as the black seemed to work best.
Assembling:
  • Glue all elements down placing white cotton between the cheesecloth and frame and behind the quote.


I really enjoyed creating this page and hope you enjoyed reading how you also could create a beautiful piece of art with my instructions or by taking on the challenge and creating your own take on this challenge. Pop over to Scrapbooking Top 50 Australia and be inspired further by other amazing artists on our design team.