Friday 31 July 2015

Remember you are Amazing.


It's years since my beautiful daughter Bel graduated but I recently found this photo, I'd printed a few variations of it a while ago for a graduation page I did. My skills at scrapping has developed a lot since the first time so I thought I might do it justice more this time....so I hope you agree that I have.

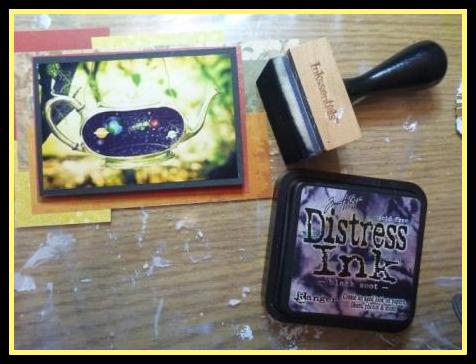
I attended the Melbourne Paperific Expo a few months ago and purchased some Metallic watercolours and thought they would be give the perfect effect for my background, so I've taken this challenge head on.

Challenges I am entering this layout are: 


ARTastic


Scrap It With Attitude


Items I used included:
  • 12" x 12" watercolour paper from my stash
  • Tim Holtz stencil 'Bubble'
  • Monte Marte Modeling Paste
  • Metallic watercolours: MicaColor 'Vintage' Sparkling Mica and Pigment Watercolour paint.
  • Scrap papers and phrase die cut from my stash mostly from Kaisercraft 
  • Flowers from 'Little Birdie', Prima and Kaisercraft
  • Brass Flower embellishments from stash and Kaszazz
  • 2 Crafty Chipboard- Bubble reed panel
  • Tinby Metallic Melts- Glistening snow, First line
  • White Acrylic paint
  • Funky Flair
  • Black cotton and white cheesecloth 

I used the MicaColor with alot of water, spraying the page before adding very watery paint, I pooled the paint at the top of the stencilled background and to make it dribble down the page I sprayed more water until I achieved the look I wanted. I ensured I allowed each color application to dry before adding the next layer/colour so I didn't have them mix and end up with a muddy puddle instead of  beautiful seperate colours I achieved.


Thanks for calling by and checking out my latest challenge entries.

Saturday 25 July 2015

White with Marsala July Challenge.

Welcome to you all and thanks for coming to see my White with 1 entry for July. I have had this gorgeous photo of my grand daughter for a while, with her rosey cheeks I thought this was the perfect photo to use for this challenge. My favourite resources at the moment include Imaginarium and funky flairs, who I wish to thank for sponsoring this fantastic challenge.


Items I used include:
  • White 12"x 12" card stock
  • Watercolour paint mixed to make 'Marsala'
  • Plastic to place watercolour onto to press onto paper.
  • Water mister.
  • Acrylic paint mixed to make 'Marsala'
  • 6" x 6" pad Crate Paper- Random Collection 
  • Postcard from Paris 11 envelope
  • 'Little Birdie' flowers and Butterfly
  • Kaisercraft flowers.
  • Washi tape 'butterflies
  • StazOn Jet black
  • Indigo Blue stamps 'Limor circles'
  • Imaginarium 'Tulip flourish' - cut in half
  • White Mont Marte Gesso and acrylic paint to cover chipboard before adding melts.
  • Tinby Metallic Melts- 'Glistening Snow' & 'Red Velvet'
  • Funky Flair - Love heart
  • White self adhesive Pearls.
  • Cheese cloth
  • White metal embellishment with Metallic Melts 'Red Velvet' added over Versa Magic Chalk 'Red Brick'


 Another favourites  of mine are: Tinby Metallic melts that you can layer and create just the right colour to give your chipboard added dimension, texture and lustre and my new 'Limor circle' stamps by Indigo Blue


 Thanks for dropping by and checking out my White with Marsala July Challenge. Feel free to come back and check out any of my other layouts past and future. Hope I have inspired you to try some new ideas and techniques.


Kraft+ July Challenge Mustard explosion

When I saw the new July Kraft + Challenge, I was unsure at first what to scrap, so I closely explored the photo to see if any one thing inspired some special moment in my or families life. Nothing sprang to mind and I was just about to give up when I noticed the tape hanging down in the right hand corner, wondering what it said I zoomed in.....'Bingo'. The words "Please cross this line" sprang open the memories of a year ago seeing my daughter standing one foot either side of the Germany and Switz borders during her amazing highland dancing experience of dancing in the Basel Tattoo in Switzerland with OzScot Australia. What amazing memories.  The border painted in yellow paint sparked an idea from which I have created my layout. The colours of my photo haven't come out as bright as the yellow border line and mustard colour of the background stamping and embossing on the actual layout but you will get the idea.


Items used:
  • 12"x12" kraft paper
  • Mont Marte Impasto to seal paper.
  • DecoArt media crackle paint with yellow paint added. (Border line)
  • DecoArt media crackle paint with black paint added. (Pavers)
  • StazOn Jet Black.
  • Kazsass Brick stencil (Pavers)
  • Heidi Swapp Mini Stencils: Remember
  • Fundermentals: camera and plane chipboard shapes
  • 6 1/2" 'Now Boarding' Kaisercraft Paper Pad: Die cut.
  • Kaisercraft Collectibles 'Closeup!'
  • Corrigated yellow and white cardboard.
  • Tinby Metallic melts 'Golden nugget' and Versa color 'Bisque'
  • Date stamp and Journaling pen
  • Dymo manual labeller.


 Thanks for coming over to see my latest layout, I had a lot of fun experimenting with texture and new products with this layout. Jump across to the Kraft+ challenge and see other inspirational works of art.

Thursday 16 July 2015

Off the Rails Scrapbooking July Inspiration Layout


At Off The Rails Scrapbooking we have 2 Mood Boards to chose inspiration from. In my first post for the month I created a canvas with the 1st Mood Board so this time I'm using the 2nd.
It seems a only yesterday my beautiful granddaughter was born, where has the last 4yrs gone..... I took a photo on her naming day and have always wanted to scrap it, but I hadn't got around to it. When I saw this mood board colours I thought....perfect and went searching for the photo. So I hope you love it as much as I do and it inspires you to find that photo that you love but just haven't got around to using.


July Mood Board No:2.


Thankyou to our amazing sponsor Imaginarium
 
Here is the list of what I used in my layout:
  • 12"x12" LaCarte Paper 'Bubble'
  • Ranger 'Multi Medium Matt' from Kaszazz- Coating the cardstock seals the surface which minimises curling and absorbancy of the layout.
  • Monte Marte Gesso
  • 'Pitter Patter' Girl pack from Kaisercraft- Hexagons cut out by hand from 12"x 12" paper
  • Imaginarium Chipboard 'Moment In Time' and 'Deco Oval'
  • Tinby Metallic Melts 'Silver' and 'Glistening Snow'
  • Tim Holtz Distress Ink 'Black Soot'
  • Flowers from Kaisercraft and Little Birdie
  • Paper butterfly from Little Birdie
  • Papers from my stash for the layered backing behind my photo.
  • Kaszazz 'Antique Buttons' Brads and 'Heart' clip
  • White Cotton Twine with Gold Thread
  • Funky Flair 'Dragonfly'
  • Brass Butterfly from my stash
  • Old Lace from my Nana's tin
  • Paper Doilies.

Here are some close-ups for you to check out.


 Come and join us at Off the Rails and enter this months challenge, with 2 gorgeous mood boards to inspire you it's going to be a great month.Thankyou again to our amazing sponsors 'Imaginarium' for sponsoring our July Off The Rail Scrapbooking Challenge. I love using their products and you will too if you win our challenge this month. Good luck everyone, I can't wait to see all of your  fantastic entries.


Monday 6 July 2015

Off The Rails Scrapbooking- July Tutorial Inspiration.


What an amazing Mood board for the Off The Rails Scrapbooking July Challenge, there are so many parts of this board that you can draw inspiration from. I was drawn to the mystical view of our 'galaxy in a teapot' and thought it would look great on a small canvas. So here is my take on the board and how I produced it.
Thanks to Imaginarium for Sponsoring this months Challenge.


Off The Rails Scrapbooking Challenge July Mood Board

Products I used included:
  • Canvas 8" x 8'
  • 6" x 6" Crafters Workshop Stencil 'Mini Antiquities'
  • Monte Meo Modeling Paste
  • Gelatos: red, blue, yellow and green
  • Scrap paper and cardboard from my stash
  • Tim Holtz Distress Ink 'Black Soot'
  • Selection of Flowers from Little Birdie, Prima and my stash.
  • Ranger Multi Medium Matte from Kaszazz
  • Glitter and fine silver opaque beads.
  • Imaginarium Designs' Dragonfly' chipboard
  • Leaf stem chipboard 
  • Versa Color Ink 'Bisque' and Tinby Metallic Melts 'Silver'
  • Embellishments from my stash: key, flower and heart 
  • 'Moon Beams' Flair from Um Wow Studios
  • Tattered Angel Glimmer mist 'Glacier'
  • White cotton twine with gold thread
  • Old Dymo manual label maker and black tape.

 Step 1: I placed my stencil onto the canvas and spread modelling paste over it, carefully moving the stencil off and replacing it to add more pattern to other areas of the canvas.

Step 2: Using the red Gelato I rubbed the colour relatively heavily around and over the edges and then used water on my finger or paint brush and blended the Gelato towards the centre of the canvas. I also used small amounts of blue over the top at the edge and blended it into the the red to darken the colour to produce a more purple colour to the edges.


 Step 3: Using a dry piece of paper towel I regularly rubbed over the stenciling gently to reveal the pattern again as it had been lost a bit with the Gelato.


Step 4: I printed out a copy of the ' galaxy in a teapot' picture on photo paper and selected a range of papers from my stash to match the colours on the mood palette and in the photo. Using 'black soot' Distress ink and applicator I edged each piece of made a stack of paper adding pieces of cardboard under the photo to add height and depth.


Step 5: I added green Gelato to the leaf stems and then blended it with water. Also used the yellow and red to add colour to the small flower buds that reminded me of a miniature versions of the tulips on the mood board.


Step 6: Versa Color Ink is great to use on chipboard, I covered my dragonfly with it and because it stays wet for a while is also perfect to use with Tinby Metallic melts. I sprinkled the melts over the ink and used my heat gun to melt them to produce a beautiful embellishment.


Step 7: I made circles from my cotton twine and glued my stack of paper and photo into place and then experimented with arranging my assorted flowers, flair and some embellishments until I was happy before gluing them into place as well. I covered my photo and paper stack with scrap paper before spraying the surface with the Glimmer Mist and sprinkling it with glitter before it dried.


Step 8: After adding my dragonfly I then placed Multi Medium and the silver opaque beads into a palette and mixed them together, then using a palette knife added the mix to the flower edges of the canvas. To add a little more sparkle I sprinkled some extra glitter onto the mix.


Step 9: I love my old style manual Dymo label maker so I made the 'A Beautiful World' title using black self adhesive tape.

Here are some close-ups for you to checkout:


Hope you enjoyed seeing how I made my 'Galaxy in a Teapot' - A Beautiful World. Pop over to Off The Rails Scrapbooking July Challenge and see the other amazing inspirational creations this month and to Imaginarium Designs to see how to view and purchase some of their gorgeous chipboard creations.