Sunday, 20 December 2015

Tis the season. Scrapbooking Top 50 Australia

Wow, the colours in this months Scrapbooking Top 50 Australia Challenge are beautiful. Normally I am a traditional type of girl when it comes to Christmas colours and layouts but this mood board inspired me to have a bit of fun with my colours. 

I loved the colours in thong photo and how it made me think of the fun I have on our Australian summer Christmas holidays with family, blue skies and relaxing at the beach. The love heart in the leaf  also reminded me of the love I have for my family and spending time together outside in our beautiful summer. 


Scrapbooking Top 50 Australia December Challenge.


Items I used include:
  • Water colour 12" x 12" paper
  • Watercolour paints
  • Small spray bottle/mister for water.
  • Dylusion Ink spray 'Bubblegum Pink'
  • Tattered Angel Glimmer mist 'Glacier'
  • Royal Coat Dimensional Magic.
  • Kaisercraft wood holly flourish
  • 'Selfie' from Funky Flair.
  • 'Tis the season' cut from a sheet of 61/2"x 61/2"paper from Kaisercraft 'Yuletide' collection 
  • Clear Xmas tree stamp
  • Stampendous Cling Vintage contract. 
  • StazOn Black Ink pad
  • Purple netting from my recycle stash
  • Cheese cloth 
  • White Drawing ink by Educational Colours Australia
  • Blue and green cardstock for backing photo
  • Cardboard and magic mount to mount flair and photo.
  • Prima wire thread 'white'


Step 1:
  • I sprayed the paper with water and began to add the watercolours using plenty of water, when I got puddles I moved the paper around to spread it or used a wet-one to absorb some of the excess.  
  • I find this difficult at times but take the time to let each layer of watercolours dry between each colour application or you end up with mud. My last layer comprised of a light spraying of water and then splatters of yellow over the other colours.
Step 2:
  • While the layers dried I stamped the Christmas tree stamp onto watercolour paper, cut them out and watercoloured them as well. Also cut out the 'Tis the season' tag from it's page and edged it with StazOn. 
  • When trees were dry I sprayed Glimmer mist over them for a sheen of sparkles.
Step 3:
  • I used purple watercolour to colour the wood flourish and then when dry added dimensional magic and set aside to dry, this took around a hour to dry. And then lightly splattered some of the purple onto my page and then some splatters of green and blue (of course waiting for each to dry before the next addition of colour).
Step 4:
  • Trimmed the photo and backed it with green and blue cardstock, I edged each layer including photo with StazOn.
  • Then glued some cardboard onto the back ready to be glued onto the page later. 
Step 5:
  • I cut 4 pieces of cheesecloth, gave them a distressed look by pulling at the threads on the edges and middle and then edged the pieces with 'bubblegum pink' Dylusions ink spray and/or purple watercolours. Later I found I needed some small pieces to add to gaps I needed to fill. 
Step 6:
  • While every thing was drying I cut a piece of netting and distressed the edges and began to play around with positioning and ideas of placement.
  • When I was happy with the placement of everything I used StazOn ink to stamp small areas with the Vintage contract stamp.
Step 7:
  •  Now it was time to put it together, I played around quite a bit until I was happy with the placement. When I was happy I took a photo with my phone so that when I moved it off to glue each layer down I could re-position each element. 
  • I made circles of wire thread to frame and draw attention to our faces and used some of the threads I'd pulled off the cheesecloth to frame the tag.
  • To finish off I covered the photo with a scrap piece of card and splattered white drawing ink with a feather brush over the page.


Here are some close ups:


 Thanks for popping over to see my latest layout, I had a great time creating this layout and I hope I've inspired you to experiment with some new techniques, use watercolour paints or some thing as simple as stepping out of using traditional Christmas colours as I did. Pop over to Scapbooking Top 50 Australia and see some other inspirational creations and maybe take on the challenge yourself and enter your own masterpiece in their December and future challenges.


Saturday, 21 November 2015

White with 1- Grape November challenge.

I love scrapping my family and have had this photo of my daughter and grand daughter for a while, I've been to more scrapbooking workshops and my scrapping buddy and amazing friend and artist Fiona of Pastiche Scrapbooking Studio has inspired me to do this page using hand drawn patterns and bright watercolours. A big thankyou Fiona for inspiring myself and so many others.


 Items I used included:
  • Embossed 12"x 12" embossed paper from my stash.
  • Mont Marte Black, White Gesso and Impasto
  • Black acrylic paint
  • Small long nosed squeezy bottle
  • Palette of Watercolour 'brights' 
  • StazOn black
  • Stampendous stamp 'Cling Vintage Note"
  • Kaisercraft and miscellaneous flowers.
  • Little Birdie butterfly
  • Scrap Girl 'heart' flair
  • Prima White wire thread
  • Cheese cloth- white
  • Tim Holtz Dyslusions Ink Spray 'Crushed Grape'

Firstly I prepared my paper with a coat of white gesso and while that was drying I mixed some Impasto, black gesso and water together and when it was at a consistency that could be poured from a small long nosed squeezy bottle with a small hole cut at the end. I felt that the impasto had slightly dulled the the colour so I added a small amount of black acrylic paint, mixing the paint and mixture together with a little more water and a good shake of the bottle. 

I drew free hand with the squeezy bottle making stripes and heart shapes using the tip of a palette knife to roughen the edges of the paint. 

After it had dried I sprayed the paper with water and then added 'grape' watercolour in different quantities in different areas until I was happy with the effect. When it was dry I used the same colour to splat around the painted areas. 

The next step was stamping some script around the painted area and cutting up 4 pieces of cheese cloth. I frayed/distress the edges; leaving two smaller ones white and spraying the other 2 with 'crushed grape' Dylusions ink spray. 

To complete the page I backed my photo with grape and black cardstock, layered the cheesecloth, added flowers, the butterfly and flair to my page. I felt it needed something to frame my photo so I wound the white wire thread into a circular shape and added over the page.


 Thanks for popping over to see my latest page and hope you join me in taking on the challenges such as White With 1 in the scrapbooking world.

Wednesday, 18 November 2015

Show us your stuff- November Challenge

I have had a photo waiting patiently to find the right page and right time to be scrapped, The 'Show us your stuff' November 'Travel' Challenge was that perfect theme and time. This photo was a perfect memory in time for me, spending time with my mum and dad in Switzerland on a holiday before we went to Basel to watch my daughter dance in The Basel Tattoo with OzScot Australia. It was a fantastic month long holiday where we were able to spend precious time together making priceless memories that will stay with me for ever.

Show us your stuff November Challenge Board.

Items I used included:
  • Patterned 'compass' paper (12"x12") and 'chevron' paper and 'travel die cut' (Now Boarding) (6"x6") from Kaisercraft
  • Mont Marte Impasto
  • Mont Marte white gesso
  • Wet Ones.
  • Ranger Dylusions 'White Linen' and ' London Blue' mixed together.
  • Distress Ink Tim Holtz; 'Iced Spruce' and ' Stormy sky' 
  • StazOn black ink.
  • Stamps: Stampendous 'Cling Vintage Contract' and Kaszazz 'Art Background'
  • Rub on 'Moment in Time" Kaisercraft
  • Flowers from my stash including Kaisercraft and Little Blue
  • Homemade embellishments: Heart embellishment Funky flair 'clock' flair, Green 'Heavenly heart with butterfly'
  • 2 Crafty 'memories' chipboard word
  • Prima white 'Wire Thread'
  • Map from my trip to Switzerland 
  • Cheese cloth
http://www.clker.com/cliparts/w/i/a/Y/y/N/scroll-hi.png

 To prepare my paper so that the mixed media layers didn't absorb into the paper and prevent the spray and dripping of the paint from bleeding I sealed my paper with Impasto. After it dried I used a large brush and brushed on gesso lightly, building layers until I was happy with the finish. To soften any sharp edges I used wet ones to wipe over the surface.

Mixing 'London blue' and 'White Linen' inks together in a small spray bottle, I had made the colour I needed then sprayed lightly in some areas and heavier in others to obtain sections that would dribble and others that didn't giving the page more depth and interest. After it dried I added stamping 'Vintage Contract' with StazOn ink and then began layering my elements and photo. Firstly I placed my cheese cloth on which I'd stretched and distressed the edges of , then my photo and finally placing flowers, die cut and heart around the photo until I was happy with their placement.

To complete the page I inked my 'Memories' chippy with Distress ink 'Stormy Sky', rubbed on my Moment in time, placed magic mount on the back of my clock flair and placed it in the centre of the rub-on. The word 'TRAVEL' was made from the leftover letters of the alphabet I had stamped from the 'Art Background' stamp for a previous layout I had made. After cutting them out I edged them with 'Iced Spruce' distress ink.

 Something was missing so after coming back the next day I added some chevron paper which I'd torn and inked the edge with some more 'Stormy sky' and some white wire circular to frame the photo. 


http://www.clker.com/cliparts/w/i/a/Y/y/N/scroll-hi.png


http://www.clker.com/cliparts/w/i/a/Y/y/N/scroll-hi.png


Thanks for coming over and checking out my latest layout and hope this has inspired you to join in with the Show us your stuff and some of the other amazing challenges that are happening in the Scrapbooking world.

Sunday, 15 November 2015

November Inspiration- Off The Rails Scrapbooking

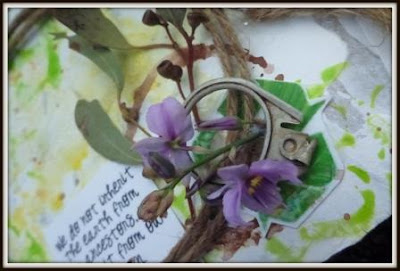
When I was a child growing up in the Mid North of Sth Australia, my parents took my brother, sister and myself out to the great beyond most weekends. One of our favourite places was the local forest where we always visited the 'Cork Tree', we were fascinated that cork actually grew on trees. This layout was inspired by those wonderful family memories and the beauty in nature.


Items I used included:
  • Gesso- Ranger from Kaszazz
  • Kraft paper- Kraft bouquet
  • Crackle paint- DecoArt white
  • Imaginarium- Kate Doily
  • Garden Grunge collection stamp -DinaWakley
  •  Stamperdous Frans- Vintage Contract
  • Lindy Stamp Gang- Magicals- Autumn leaves (cat tail cooper brown.
  • Lindy Stamp Gang- Starburst Colour spots (Seamint green, Glory of the seas gold)
  • Kaszazz 'Art' Stamp
  • Twine
  • Cheese cloth white- stained with Dylusions Ink- chopped pesto
  • Dylusions Ink - Lemon zest, London Blue, Cut grass
  • StazOn Ink
  • Natural elements- leaves and gum nuts. 
  • Water bottle to spray paper, paint and ink.
  • Watercolour paints

Firstly I covered the patterned Kraft paper with white gesso then remove sections with a 'wet one' nappy wipe. When dry I sprayed the paper with water and using a feather brush dipped into the starburst colours, gold first then the green. Even if I hadn't been in the bush with no electricity for heat guns I still would of allowed this layer to dry naturally as I did as it allows the paint to dry were I wanted it and not be moved by the hot air. I then repeated this process with the 'magicals' copper brown.

I painted the Imaginarium positive and negative pieces with white crackle paint and let it dry to crack. Then I pulled at my cheese cloth until it looked distressed and sprayed it with 'Chopped Pesto. 'As it was drying I stamped my grung flower stamp and script onto my dried page, cut out my words and edged them with StazOn and then went for a walk to collect some natural elements. to add to my design. 

I layered and moved my pieces until I was happy with their placement and to pull all my elements together I used twine in circles.


Thanks for visiting and I hope I inspired you to join in the fun of scrapbooking your memories as I do. Jump over to Off the Rails Scrapbooking and check out the other amazing layouts and projects by the incredible artists on the design team.

Saturday, 7 November 2015

October tutorial- Off The Rails Scrapbooking.

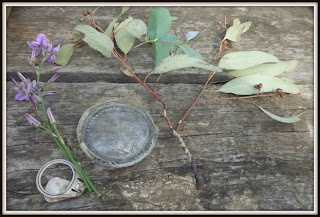
I have always enjoyed re-using or re-purposing items from my recycling box, I re-use wrapping paper where I can, ribbon, boxes, paper bags etc. Boxes are perfect instead of wrapping paper, giving your present a personal touch and making it very special for the person who receives it.
With my mums birthday coming up soon I thought it was a perfect time to decorate a box for her to place her present in. So while I was on my camping and geocaching holiday with my hubbie I thought I would take my scrapbooking supplies along and create this for my mum.


Items used:
Recycled items including:
-Cardboard box that I received my computer battery in.
- Photo of mood board printed for colour reference and picture inspiration 
- Bottle base found at my campground on the ground
-Ring pull from a can: found at my campground on the ground 
-Empty pill blister pack
-Twine from presents and miscellaneous places.
Natural elements from my camping holiday:
- feather from 'Kryal Castle' in Ballarat
-gum leaves and nuts
-flowers
Scrapbooking supplies:
-Ranger Gesso from Kaszazz
-Ranger Gel medium (matt) from Kaszazz
-Set of watercolours
-Deco Art media Crackle Paste White.


 1. Remove labels from box and cut out verse and recycle symbol. 'Green' one of our child care crocheted cats watched over the process of this project to be able to go back and share the techniques with the children ( the child care cats travel on holidays with our families and staff, writing about their adventures in their books.).


2. Place gesso on with spatula then let dry. Then add crackle paste to area you want to crackle.

 3. Using the flat side of the blister pack add gree water paint that has been mixed with Matt gel medium and then place the painted pack surface onto the gesso area of the box in a stamping style. Repeat with a yellow watercolour mix. 

4. Splat surface of box with orange, brown, green and yellow waterpaint.


 5. Thanks to my friend Fiona's inspirational idea, I have twine tied around my molding paste container ready for use. I have 1 string, 2 string variations.


 6. I looked around the campsite and found a variety of leaves, nuts, rubbish and flowers to use to decorate the box. 

7.I placed brown watercolour paint to the base of the broken bottle and when I placed it onto the box moved it slowly twisting it in a circular motion to obtain a circle and not just a dotted circular line.


8. Adding the verse and recycle symbol and the natural/recycled elements to my box finished off my project.


Thanks for popping over to checkout my latest tutorial. For more inspirational pieces of art drop over to Off The Rails Scrapbooking to view other amazing artists.

Friday, 23 October 2015

Kraft+ feather+ nature Nov Inspiration.

I have been doing some 'Scramping' during my holiday, sitting out on a picnic table surrounded by gum trees, rosellas, kookaburras, and the sound of the wind gently rustling above me in the trees just to name a few things I can see while I scrap my beautiful grand-daughter's photo of her playing in a gum tree.

This is the child care cat that came on holiday with us, 'Green' is learning to scrapbook so he can share it with the children when we go back to work.


Not the best photo it was sunny on moment and shady the next so it was a little tricky to get the best photo.

Items used included:
  •  Kraft paper- Kraft Boutique pack
  • Gesso- Ranger from Daszass
  • Deco Art cracle paint white
  • Dylusions Ink- chopped pesto
  • watercolours
  • corrugated cardboard from an old box
  • cardboard to create layers
  • Butterfly stamp clear
  •  Kaisercraft paper from Kaleidoscope and enchanted garden.
  • Twine- different sources
  • gum leaves and nuts from around the camp site
  • Peacock feather from our trip to Kryal Castle
  • Flower- 'Little Birdie'
  • Kraft tag- Francheville
  • Fran's - Cling vantage note- Stampendous.


Check out and be inspired by other amazing scrapbooking pieces of art at Kraft+.

Tuesday, 15 September 2015

Create Unique Art- Off The Rails Scrapbooking Inspiration

I have always loved photography and I have always dreamed of being able to take night time photos that actually work! We are lucky to have an amazing photographer in our town that takes groups for workshops, my dream workshop was advertised and I dove at the chance. Night and long exposure photography with steel wool fire shots and night sky photography as my highlights. Here is one of my favourite shots.


Off The Rails Scrapbooking September Challenge.

2Crafty


Items I used: 
  • 12" x 12" white cardstock
  • White and Black Gesso- Monte Marte
  • Modeling Paste - Monte Marte
  • Dylusion Ink Sprays- 'White Linen', 'Black Marble'.
  • Semco Acrylic paint- 'Crimson Red'
  • Tim Holtz Distress Inks - 'Black Soot', 'Iced Spruce'.
  • 2Crafty Chipboard- '6" Circle Revolution'
  • Black Cotton
  • White Cheesecloth
  • Black Cardstock
  • Camera - Funky Flair
  • 'Art Background' Stamp- Kaszazz
  • StazOn 'Black' Ink 
  • White card stock for stamping
The background was created by placing modeling paste down the centre of the page using a flexible scrapper, I placed black gesso dribbles over the top while the paste was still wet and then added more modeling paste over the top until I obtained the look I liked. I added strips of watered down black gesso in a sweeping motion and then red (watered down Crimson Red acrylic paint) in the same method to the centre and adding fine splatters of both black and red over the page.

The chip board was sealed with white gesso and when dry multiple layers of Crimson Red acrylic paint added until the depth of colour was the same as on the September mood board. 

The photo was edged with white gesso and backed with black card to give a small border. A small piece of cardboard was glued to the back of the photo to give lift to the photo and depth to the layout.


I coloured some distressed cheesecloth with 'White Linen' and 'Marble Black' Dylusion Ink Spray and then added another layer of distressed cheesecloth on top of the coloured. A long piece of Red Cotton was the next layer before adding the photo to the stack.  The chipboard was used to frame the layers and phot0 with the page being edged with 'Black Soot' and 'Iced Spruce' Distress Ink and white gesso (added with a spatula).

I stamped the 'Art Background' stamp onto white card with StazOn 'Black' and cut out the single words 'Art', 'Create' and 'unique'. I then edged them with 'Black Soot' Distress Ink and glued these onto the layout to make my quote to add the finishing touch to my layout.


Thanks for dropping by to have a look at my design team piece for Off The Rails Scrapbooking.  A big thank you to the amazing 2Crafty chipboard company for sponsoring our September Challenge.

Monday, 7 September 2015

September Tutorial - Off The Railscrapbooking Design Team


Over the last couple of years I have as you possible have or are, collecting lots of scrapbooking magazines. So instead of having boring plain magazine holders I thought why not scrap them too.
Here is Septembers Off The Rails Scrapbooking Mood Board which is sponsored by the amazing Chipboard company 2Crafty


Off The Rails Scrapbooking
2Crafty Chipboard


Items I used:
  • Blank white magazine holders from Ikea (pkt of 4).
  • Black gesso- Monte Marte
  • 12" x 12" paper of choice; mine was from my old stash (Crafty Kids now known as Kaszazz)
  • 2Crafty Chipboard 'Square collage panel'
  • TCW Rebekah Meir designs 6" x 6" mini Labyrinth stencil
  • Semco Acrylic black and white paint.
  • Monte Marte Modeling paste 
  • StazOn Black Ink
  • Tinby Metallic Melts 'Glistening Snow'
  • 'Funky tree' and small Feather stamps; Kaszazz
  • Black and red card Stock; Kaszazz
  • Black and white twine
  • Funky Flair 'Jar of Joy'
  • Kaisercraft 'Outdoor trail' 6" x 6" paper pad; The stag and paper that the feather was stamped on.
  • Tim Holtz Distress Ink 'Black Soot'


1. Firstly  I assembled the flat pack cardboard magazine holder. 

2. Use the box as a template to transfer its shape onto the paper you wish to cover the sides and front with.


3.Using Black Gesso paint the edges and the back of the magazine holder.


4. Waiting for it to be completely dry.


5. Glue the paper onto the holder with the join in the front. (This will be covered)

6.  Blend upper and lower edges with 'Black Soot' Distress Ink, you can also at this stage paint the inside of the box black.

7. Cut a piece of black card slightly smaller than the front panel of the holder and then cut a red one smaller than the black card. Use double sided tape to join them together.


8. Mix black and white acrylic paint together to make a shade of grey darker than you need then add some modeling paste, this will lighten the colour.


9. Using a spatula and the stencil add the grey modeling paste to one side of the new panel piece.


10. Cut up the 2Crafty panel to achieve the shape that you want. Mixing some more grey paint, cover the pieces with paint and then sprinkle Metalic Melts over it. Use a heat gun melt the Melts, if you need to add more Melts cover the pieces with embossing distress ink first before sprinkling on more melts and using the heat gun again. This is the beauty of these embossing powders; it can be heated more than once which can lead to layering of colours if you wish.


11. Using StazOn to stamp a tree onto the opposite side of the panel on the lower corner. I stamped another onto some black card and cut out whilst I could still see the out line before it dried. I also printed a feather onto some paper I found that had stags and outdoor contour patterns on it. I cut out the feather and the stag to add to my panel.


12. Now play around with the placement of your photo (mine was chosen from the mood palette) and layering papers, twine, stag, feather and funky flair (which had chosen because of the jar in the mood palette) and glue then in place. 

13. I added a few words onto the background, you may chose to use a word/text background stamp.

14. Glue panel onto the magazine holder and fill with your favourite magazines. 

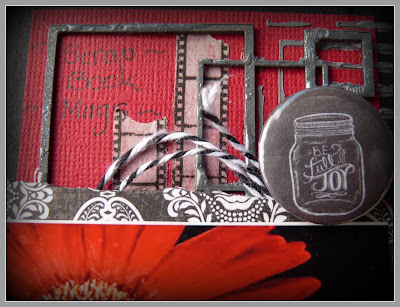
Below are some closeups for you to see, the flower in the photo has come out more orange than red which I'm disappointed with but you will get the idea.

Thanks to dropping by to check out my latest tutorial, hope you enjoyed it and be sure to pop back to see the other amazing pieces of art from the Off The Rails Scrapbooking Design Team and of course the fantastic entries as the month goes by.