I always forget my shopping bags when I go to the shops (here in South Australia we have to supply bags or get charged for plastic or paper bags), so I have accumulated quite a few paper bags over the last year. This Christmas I decided to make gift bags instead of using wrapping paper (they can be seen on my blog), here is my tutorial on my Paperbag Birthday Gift Bag version.


I started finding the products I needed:
Stencils: Tim Holtz 'Arrows' and The Crafters Workshop 'Mini Kaleidoscope' .
Stamps: Prima rectangular stitching, Alphabet blocks brought from Lincraft and 'Season' from Kaszazz.
Mont Marte Modelling paste
A selection of scrap and 6"x6" papers: Kaisercraft 'Kaleidoscope' and 'Random' Crate Paper Co
Ranger Glossy Accents
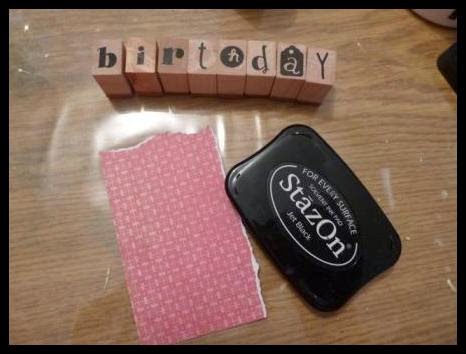
Staz On Jet Black Ink pad
Dylusions Ink Sprays: Lemon Zest, Bubblegum Pink and Crushed Grape. White Linen and Black Marble.
Distress Inks: Antique Photo, Black Soot and Peeled Paint.
and of course
a paper bag.

Using the Dylusions spray inks I randomly sprayed ink over the 'mini kaleidoscope' stencil which I had placed on the top right hand part of the paper bag. I removed the stencil carefully and dried the ink with a heat gun. Replacing the stencil slightly off centre to the previous position I spread modeling paste over the stencil this time.


I chose a range of papers from my 6"x6" paper pads from Kaisercraft 'Kaleidoscope' and Crate Paper Co. 'Random Collection' and die cuts from one of the Kaisercraft collection and tearing pieces layered them using magic mount to raise the bird, 'love' die cut and words to give more depth and dimension.
I also used black and white cotton twine to frame the words. and curved the butterfly's wings to give it more dimension

Using the 'Peeled paint' distress ink to add colour to the modeling paste and with the 'mini kaleidoscope' stencil to add to the background behind the layered papers. I used the 'Antique Photo' to edge the layered papers section.
Using the wood block stamps I stamped 'Happy Birthday' with Staz On onto torn pieces of the pink paper I had used on the layered section and edged it with 'antique photo'
I used the Tim Holtz 'Arrows' stencil and Distress ink 'Black Soot' to add chevron arrows to the background, also used the smallest 'rectangular stitching' stamp and Staz On and the 'season' Kaszazz stamp to add more depth. I place some black cotton on the bag under the layered paper and after gluing the paper down I splattered the 'Bubblegum Pink', 'Black Marble' and 'White Linen' to finish the bag.


Hope you enjoyed reading my Paperbag Gift Bag tutorial for Off The Rails Scrapbooking. Next time you get a brown paper bag have a try in making an unique gift bag for a friend or family member or maybe you can think of another way to re-use a paperbag.
No comments:
Post a Comment