Showing posts with label Prima paints and waxes. Show all posts

Saturday, 20 October 2018

October is the month of blue over at Imaginarium Designs

The year is flying past...It's October already it's hard to believe. I  have just had the opportunity to attend a fantastic retreat..full of friends and inspiration. Here are a few of the things I was inspired to create. 

The first creation was using some of my ephemera from a stop over to my favourite antique shop in Casterton. 


 I used a combination of blue toned paint and white gesso for the background of this map page of ephemera from an old book that was falling apart. When dry I used a sewing machine to stitch in straight and zig zag stitches around the black border to define and add texture to the page. I used distress oxide ink to colour the heart, background and # chippie, building layers of a range of papers and natural hessian further adding depth and more texture.


The chipboard I used in this page included:

IDW0094 #instagram etc.
Circles and diamonds IDS0091
Nats hearts 1 IDD0042

My second creation I would love to share was created in my art journal and as I didn't want too much bulk in my book I decided to challenge myself in how many ways I could use one stencil.


The background was blue acrylic and gesso blended together with my fingers as the tool. I used 'Kate Stencil' for my challenge stencil and began with using a scrapper tool to smear white gesso over the stencil. When dry I sprayed Lindy's Danny Zuko Denim over it several times which softened and defined pattern all at the same time. The second technique was stamping over the stencil with a blending tool and Distress Oxide ink 'Denim'. While the ink was still dry on the stencil I turned it over and printed with it like a stamp.  I dried each layer with at heat gun to ensure that it was dry before the next layer was added. The next technique I used was using an Faber Castell ink pencil and tracing the inside edges then I used a water paintbrush to gently add water to the edge of the marks to make them bleed and blend with the background. I painted the phrase in a white paint with only a slight touch of blue added. To finish off the page I stamped a single dandelion in a grassy spot being blown by the wind.


The Imaginarium products I used were:

Kate Stencil IDMM005

Rest Relax Recharge IDP0194

My last share was a quick tag I made when I realised I had only made 3 instead of 4 project pieces...oops. I was a great way to challenge myself in creating with no plan and going with what felt right in the moment.


I tore up a cardboard box to make the tag, ripping off some of the top layer to reveal the corrugations. After making a hole I tied some white twine through the hole then constructed layers using a variety of papers including an old dress pattern to add some extra dimension. The chippie was coated in Distress Oxide ink 'denim' and placed onto the tag with the layers to complete the look.


The chippie I used in this tag was:

Morrocan border IDB0012
Just for you 4 in a board IDP230
Hope to see you all again soon and happy creating. Pop over to Imaginarium Designs and checkout the amazing pieces of art the other design team members have created.

Wednesday, 20 December 2017

Christmas with Imaginarium Designs Chipboard.

What an amazing year it has been creatively for me I hope it has for you all too. The year has flown by so quickly. I love Christmas and thought I'd like to finish off the year and share some of my Christmas creations with you.

My first creation is recycling a mini chocolate box and tag I received from a friend.


The box was smeared with heavy white gesso and whilst wet I layered white cheese cloth, chipboard pieces and decorations onto it. I started with small leaves were coated with black gesso, a Christmas tree, berries and 'Merry' word that were stamped with Versa ink and then embossed with Tinby Metallic melts or normal embossing powder with a reindeer that was cut from glossy paper used with one of my Christmas dies. The box was finished with flowers, copper wire and chipboard stars I painted pearl.


Leaves and circles flourish tiny IDT0029

Christmas tree board IDS0008

Merry christimas for cards 4 in a board. IDP0010

branches and leaves IDDN0013

 My second creation is my Christmas canvas, using layers of torn pages, acrylic paint, stenciling and doodling as a base for my 3 dimensional hanging element.


The 3 dimensional element is made on hessian triangles with additions of ID chipboard, flowers, old pages, tags, cheese cloth and cloth Christmas ribbon. The chipboard used included stars painted with a metallic pearl paint, the presents with a range of Prima metallic paints and the leaves inked with Tim Holtz Distress Inks.  The bauble was coated with spray gesso and the Merry Christmas painted with copper paint. Copper wire was twirled around twine to add a metallic shine and to give it shape. To finish the canvas I used 7 Dot Studio Stickers to add journaling and personalise my canvas.


2 baubles and hangers.IDDS0002

4 Presents on board IDT0008

Merry christimas for cards 4 in a board. IDP0010

21 stars in a board IDS0076

Nat's hand drawn leaves IDD0044

My final share for the year is the cover of my Imaginarium Designs Journal I have been working on all year, adding a page each month until this month, where I'm left with the cover to compete my year of creating with Imaginarium Designs.


I glued layers of Imaginarium Chipboard and Resin Rainbow resin shapes onto the cover of my journal and then coating it all with black gesso. With brushes and my fingers I covered the pieces with Prima Metallique acrylic paints and then with a final coating of different coloured waxes.


2 baubles and hangers.IDDS0002

Honeycombe 6x6 IDS0054

Chris small arrows and shapes board. IDDC0001

IDT0035 Katie doily 2 in board

Lower case (18 on a card) IDALC0001A

Main letter set lower case smallIDA0005

Mirrored bracket IDFR0005

Kerry flourish tiny IDT0026

Bicycle small IDT0018

It's been so much fun being able to share my ideas and creations with you all this year and I would love to see what everyone creates with this fantastic product, hopefully I have inspired you to take on some new challenges. 

Hope you all have a Scrapping good Christmas and come back to see us next year. I'll be busy over the next few weeks getting my creative juices flowing as I relax on my holidays with friends and family.

Merry Christmas and Happy New Year to you all.


Friday, 20 October 2017

Hi from Imaginarium Designs October

Hi everyone, Wow where is the year going!!!! Time is flying and it's my turn to share with you again my creations with our wonderful Imagination Designs Chipboard.


My first piece is my October ID Journal page. This is a page is of my beautiful grandchildren using old fashioned tin can phones in a photo shoot for their great grandpa who was entering a photo competition. 


The background was created using a variety of white, blue and green acrylic paints, stamping in gold acrylic and black StazOn, doodling done with a whiteout pen and black acrylic drawing mix in a fineline applicator bottle. The chipboard chosen was perfect to reflect the fun conversation that was happening between my grandchildren. Lots of laughter and Blah Blah and joking around. The arrows were coated in a red acrylic paint for the pop factor and the conversation words in black gesso.


IDW0098 Just kidding Oh yeah ooh ooh Blah Blah
IDD0072 Loolabelle's Single Chrevons


I suddenly realised I hadn't made a card for my nephew for his birthday and my mum was dropping by in 40 mins to pick one up to take to Adelaide...oh oh..


Quick grab the card stock( sprinkled with 2 Lindy's Stamp Gang magical shakers colours and water spray, stamped with Staz On ink, some drawing acrylic paint and pieces of chippie: cogs (cover with Distress ink), a little boy, arrows ( coated with Prima acrylic paint and wax) and Happy birthday (painted with black gess). And of course a heat gun (life saver) and 30mins later a card signed and placed in an envelope with some money was handed to mum as she dropped by with 10mins to spare. YAY!!


9 clogs on board IDS0018 13x11cm

Boy silhouette IDS0028

Loolabelle's nested Arrows IDDL0018

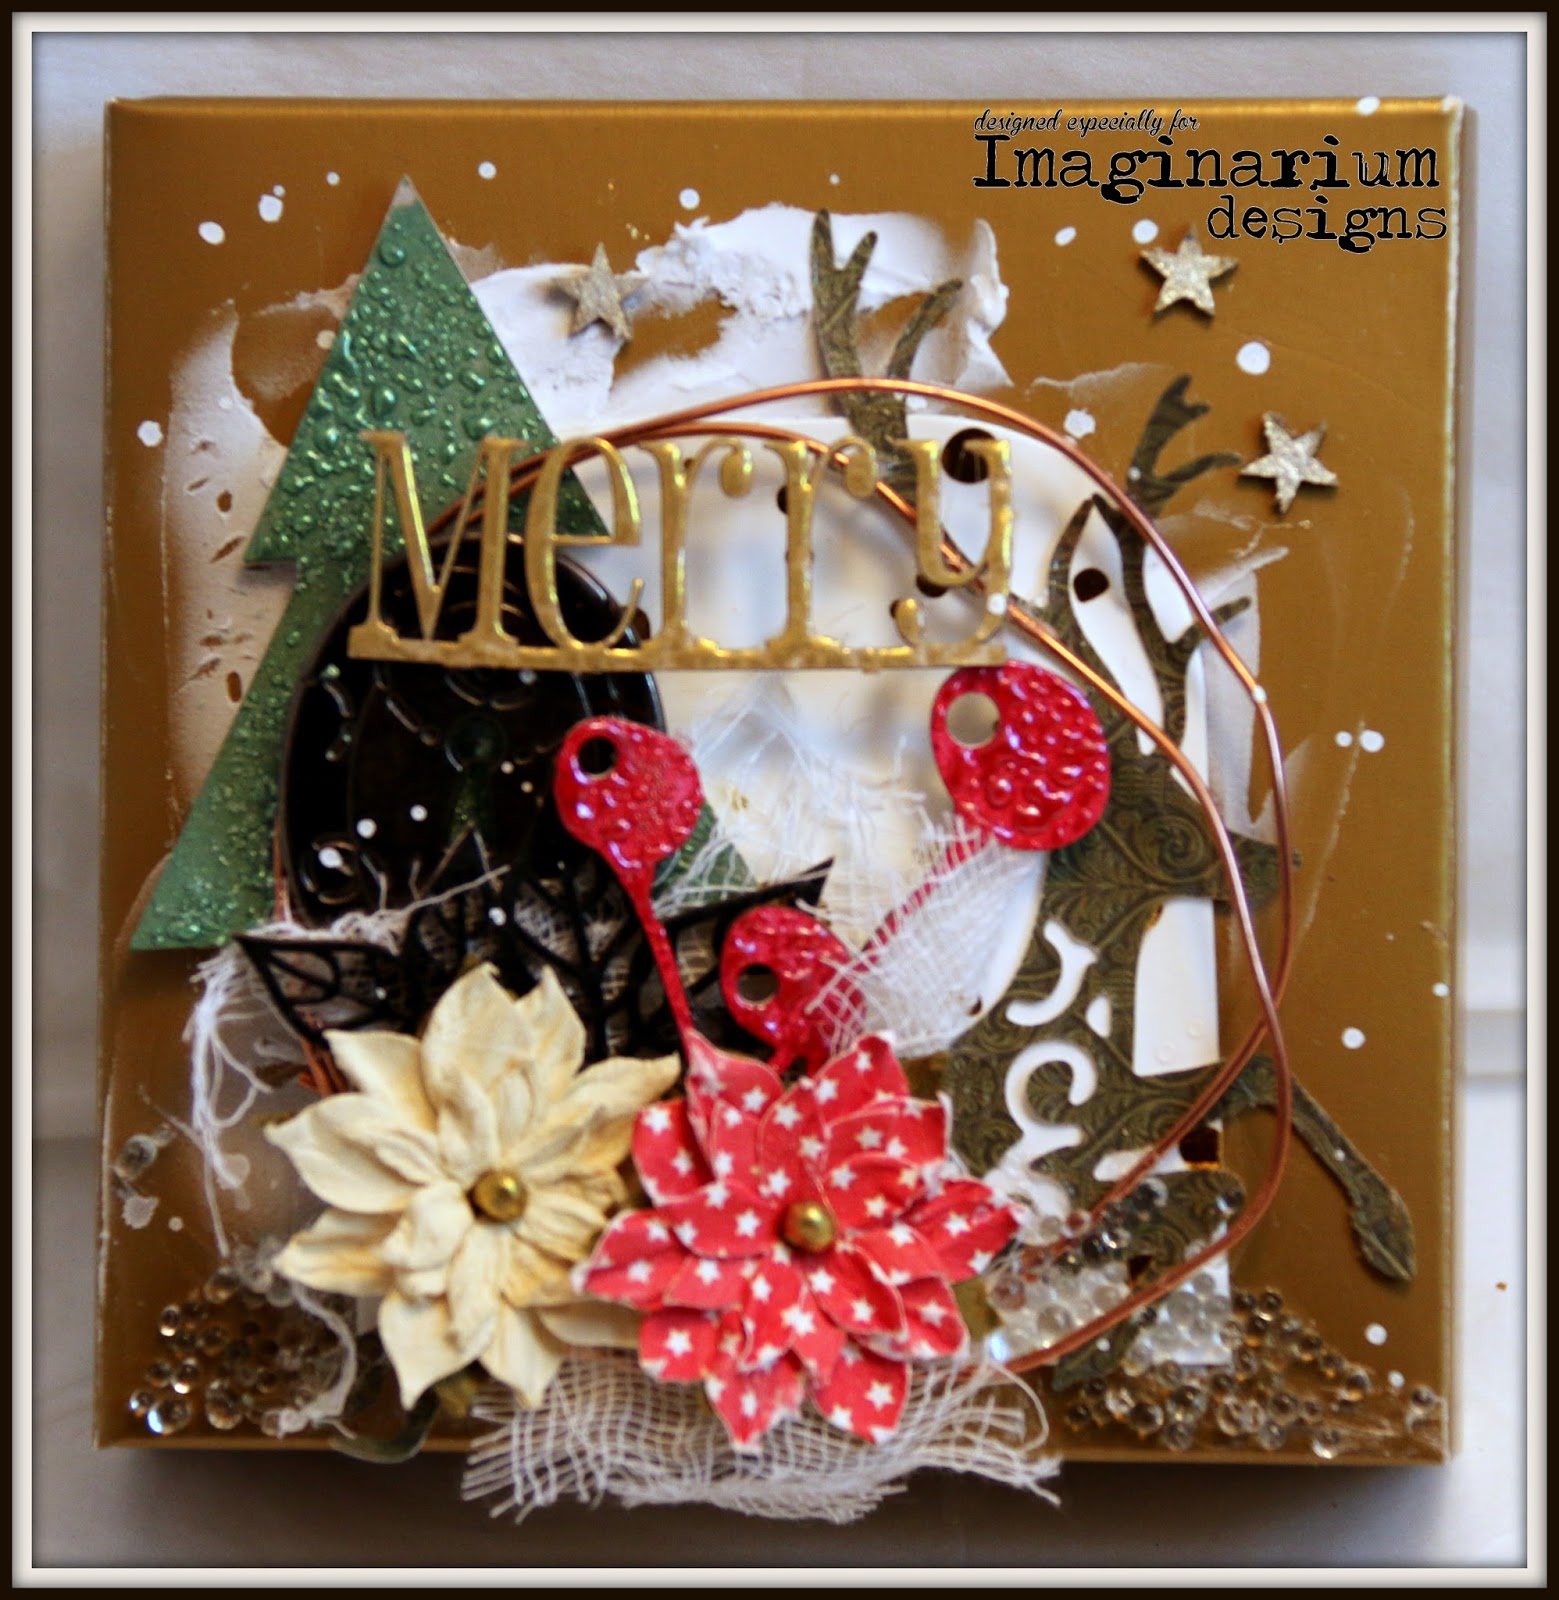
I left my favourite creation for the last share of today. I have been inspired by several artists over the last few years including our own Sue Smyth on the Imaginarium Design Team who has been creating amazing 3D book covers and canvas's. I have been saying I'm going to give it a go for what seems forever. So here is my first attempt and I must admit I'm wrapped with how it have come together.


I glued all the chipboard pieces, small frame, resin bits and bobs and metal embellishments I could find onto the book cover, taking my time to explore and experiment in their placement. I then covered them with black gesso and then when dry I added layers of colour with combinations of Prima wax, paints and powders, stamping script writing with StazOn black.  


Lower case  IDALC0001A
IDD0027 Denises ARt Deco embellishment frame large

IDS0009 Bird cage 2 in board.

Embellishment1 flourish IDF0003

IDFL0014 Jessica Florish 2 per board


Janice Flourish IDFL0026

Long Swirly Flourish small IDFL0011


Thanks for popping over to my blog to check out my latest creations, I highly recommend stopping by Imaginarium Designs and checking out my and the amazing design teams latest pieces of art. I hope I has inspired you to explore some new ideas such as new techniques and products in journals, making cards and taking the big step to try something that you have always wanted to try and were unsure about. Go for it it's fun and very rewarding.