Monday, 20 February 2017

Imaginarium Designs February Inspiration


Hi everyone, great to have you drop by to check out my latest creations for Imaginarium Designs Chipboard. I've created 3 very different designs to show the you don't need to do 12"x12" layouts to use this amazing product.


The first project I made was a tag, something special to give one of your friends or family members.


I kept the techniques simple so they were both features and blended with the background not to take away from the stenciling and inking. The 'Butterfly' was sprayed with White Gesso Spray with the 'Bubbles' and 'Imagine' being inked with Lindy's Stamp Gang spray ink, covered with 'Glossy Accents' and splatted with white ink. One of the 'Arrows' were sprayed with White Gesso with the 2 smaller 'Arrows' being brush painted with a combo of Lindy's spray ink colours before covering it with a coat of 'Glossy Accents'.


Imagine believe IDW0079


IDT0014 4 small butterflies
Nats bubbles Med IDD0037


Loolabelles Love Arrows IDDL0023


My second creation was a Journal page where I experimented with Lindy's Stamp gang ink sprays, water and stenciling.


The chipboard was used to give depth to this double page with the raw 'Honeycomb' and 'Wrought Iron' was given a coat of colour. The 'Nested Hexagons' were painted with Blue and green Flat Pabio Lindy's spray. The hexagon inserts from the 'Honeycomb' I covered with Kaisercraft papers and inserted some back into the gaps.


Honeycombe 6"x6" IDS0054

IDFL0017 Wrought iron embellishment B
Loolobelle's nested hexagons IDD0017


The final project I made was a wall hanging, I made one for Christmas and love it so much I thought I'd make another to hang all year round.


The hanging was constructed on hessian which I'd experimented with homemade eco dying. Over a few weeks as I walked past it in my craft room I randomly splattered it with a variety of inks that I was putting back from my creating time. The 'Clock with no face' chipboard piece was covered with Finnabair's rust pastes. Look out for how I did this in coming months at the Imaginarium Design blog. The 'NEW Lamp/sign post' was painted with Dylusions ink and the 'Arrow' was sprayed with White Gesso.


Clock face without centre and hands IDS0017


Loolabelles Love Arrows IDDL0023


Thanks for popping over to check out my latest creations, happy scrapping everyone.

Saturday, 18 February 2017

Scrapbooking Top 50 Australia February Inspiration.

Hi everyone, I'm back to share my latest creation for Scrapbooking Top 50  for February.


My beautiful daughter and my grand daughter, 'This is what love looks like', the love of a daughter and her mum. This what I love, my daughter and her daughter having fun together. (and of course my grand son too)


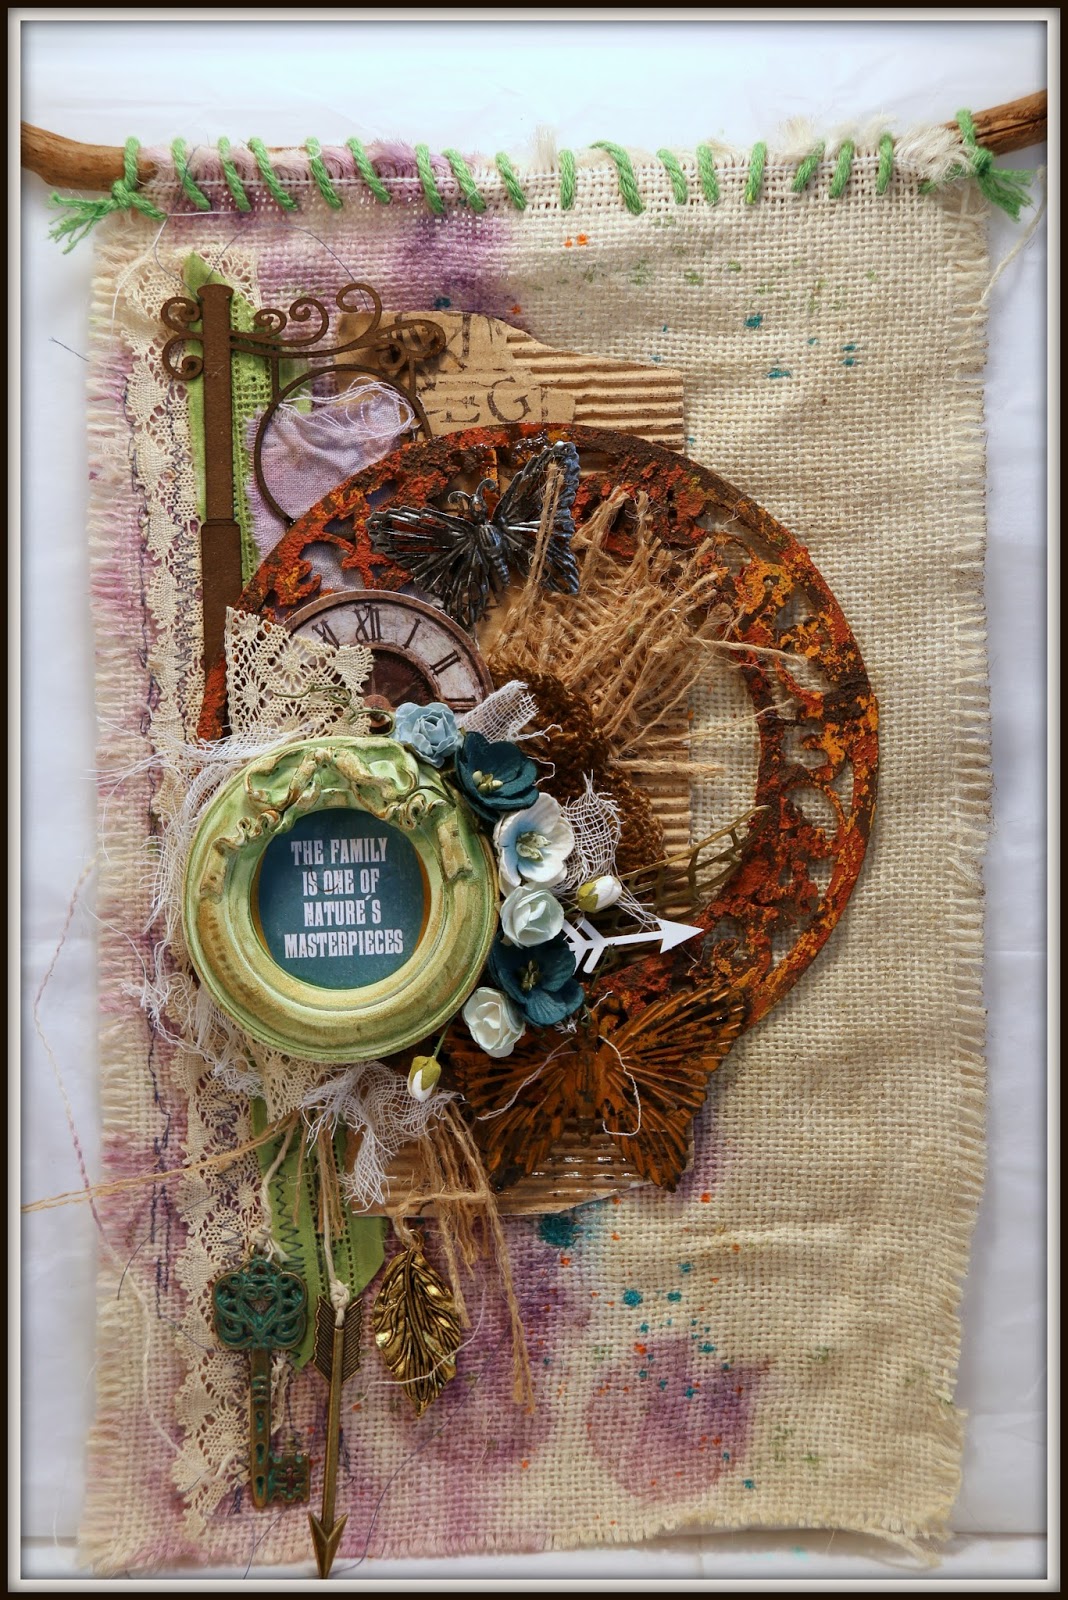
I love using Lindy's Stamp Gang ink spray with water to create my backgrounds. I used gel medium with a stencil first and then when dry I sprayed the paper with a spray bottle to wet it, this allows your ink/paint of course to bleed and produce a soft edge. I added Lindy's 'Danny Zuko Denim' with a well loaded wet brush loading the ink onto the wet brush and moving it with more water spray developed this watercolour effect.
StazOn black ink used on my heart stamp allowed the heart to stand out as a feature and then I stacked black and white papers, a piece of patterned envelope and black cotton for my next layer to ensure the photo would stand out. Black and white wire thread  was used to frame the photo where my gorgeous grand daughter photo decided to join her mum in a selfie shot. I also added some stamping in the background to add interest and balance.
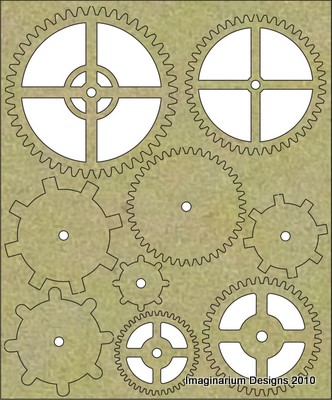
The amazing Imaginarium Design Chipboard I chose included:
 
IDDL0015 Lous heart shapes

This is what love looks like IDP0111
....The heart chipboard was covered with Versa color and then embossed with Tinby Metallic Melts and the title was inked with Black Gesso and splattered with white ink using a fan brush.  To finish the page I added splats of the 'Denim' and white ink, to add depth and interest.


Thanks for popping by and hope to catch you over at Scrapbooking Top 50 Australia, I would love to see what you can create with the our sketch challenge.

Tuesday, 14 February 2017

'Dream, the world awaits you' Scrappy Chat Designs 'Lucky Charm Kit'

Hi, Scrappy Chat Designs friends! It's Sandi here to share with you 

my 'Dream, the world awaits you' using this month’s  

Lucky Charmkit.


I enjoyed layering the 'Lucky Charm' paper and combining the watercolour 'Colour Crush' powder paint to create this beautiful feminine layout using a soft focused photo. The inclusion of the additions to the kit provides you the opportunities to explore both rustic and feminine layouts with special touches of sparkle and subtleness.


Are you a Scrappy Chat Designs member yet?  Our members receive videos, tips and tech sheets similar to this little technique every month.

If you want more of this then ...........


Here is how you can join!

Joining Scrappy Chat Designs is like doing 3 classes each month - all in the comfort of your own home!

Each premier kit comes with:
Video AND instructions to complete the three layouts and feature many techniques with product to be used well after the life of the kit. (With all of our kits you will have plenty of product and knowledge to add to future projects)
Photos of each project including close up detail pictures.
All the product needed to complete the project with a list of additional basic items used such as ink/ paints/gesso/texture paste and colour sprays you will need out of your supplies.
The kits focus on how to use various products teamed up with some pretty paper to compliment them, so there is always less or non-consumable products in our kits, to not only help you complete some beautiful projects, learn many techniques and ways of using the different product as well as taking them well beyond the kit projects.

Kits are $45 + postage and come out monthly. Please e-mail us at orders.scrappychatdesigns@gmail.com if you would like to order this kit

For more kits and other products visit our website www.scrappychatdesigns.com.au
Scrappy Chat Designs Kit club Membership (e-mail us to purchase):

This lasts for 3 months is $149 and includes 3 kits at OVER 10% off!!! and postage for all 3 kits  INCLUDED (they are released monthly).  As a member you also get ‘insider’ info on what is coming up in the next kit – sometimes even a pic! You get additional 'Technique sheets' showing you more techniques you can nail with the product in the kit from the talented Arty Chic's.  You are also guaranteed the kits which do sometimes sell out VERY quickly.  If you are interested in membership, you need to pay the membership fee by the 30th of the month prior.  So to commence in February (next kit to be released) you need to have your membership fee paid by 30th January. Just email for this deal orders.scrappychatdesigns@gmail.com 

Just email for this deal orders.scrappychatdesigns@gmail.com

Thursday, 2 February 2017

A Charming Tea Party- Lucky Charm Kit.

Hi, Scrappy Chat Designs friends! It's Sandi here to share with you 

my 'A Charming Tea Party' using this month’s stunning 

Lucky Charmkit.


Using the rustic papers and arrow complimented this unique photo of a old stairwell area with teapots as flowerpots. 
I enjoyed working with the 'Lucky Charm' paper as the kit contains the opportunity to explore a range of styles and techniques using the feminine or rustic combinations of papers as well as experimenting with these wonderful watercolour powder and the magnificent metallic melts.


Are you a Scrappy Chat Designs member yet?  Our members receive videos, tips and tech sheets similar to this little technique every month.

If you want more of this then ...........


Here is how you can join!

Joining Scrappy Chat Designs is like doing 3 classes each month - all in the comfort of your own home!

Each premier kit comes with:
Video AND instructions to complete the three layouts and feature many techniques with product to be used well after the life of the kit. (With all of our kits you will have plenty of product and knowledge to add to future projects)
Photos of each project including close up detail pictures.
All the product needed to complete the project with a list of additional basic items used such as ink/ paints/gesso/texture paste and colour sprays you will need out of your supplies.
The kits focus on how to use various products teamed up with some pretty paper to compliment them, so there is always less or non-consumable products in our kits, to not only help you complete some beautiful projects, learn many techniques and ways of using the different product as well as taking them well beyond the kit projects.


Membership can be purchased in 3 or 6 kit memberships.  Click on the memberships in the side bar to get yours today.

Kit individually is $45 + postage Australia wide.  Head HERE to get your kit

For more kits and other products visit www.scrappychatdesigns.com.au

This lasts for 3 months is $149 and includes 3 kits at OVER 10% off!!! and postage for all 3 kits  INCLUDED (they are released monthly).  As a member you also get ‘insider’ info on what is coming up in the next kit – sometimes even a pic! You get additional 'Technique sheets' showing you more techniques you can nail with the product in the kit from the talented Arty Chic's.  You are also guaranteed the kits which do sometimes sell out VERY quickly.  If you are interested in membership, you need to pay the membership fee by the 30th of the month prior.  So to commence in February (next kit to be released) you need to have your membership fee paid by 30th January. Just email for this deal orders.scrappychatdesigns@gmail.com 

Just email for this deal orders.scrappychatdesigns@gmail.com

Friday, 20 January 2017

Imaginarium Designs January inspiration share.

Hi everyone, it's great to be back this year with more inspirational ideas on how you can use Imaginarium Design chipboard to enhance your own creations.


This year I thought I'd start an inspiration journal and would like to share my journey with you all.


I glued the Imaginarium chipboard hearts, vine flourish and frame onto my white gesso painted double page also giving them a coating of gesso too. I then glued book pages onto the a section of the frame, gently massaging the glue covered paper over the chipboard before adding the background colours to both the paper and chipboard. The 'Gates' were painted with Finnabair's rust paste; 3 pastes layered over the chipboard until I was happy with the effect. To complete the page I added cheese cloth, flowers and embellishments.

The items I used in constructing this project included: 
  • An old book; I glued groups of 8 pages together then ripping out 8 (repeating til the end of book) before giving the finished pages a rough coat of white gesso.
  •  Finnabair's rust paste set of 3 colour pastes.
  • Lindy's Stamp Gang 'Magicals'- Mad Hatter collection (mix of flats and shimmers inks)
  • Brass keys, butterfly and clock face
  • Script stamp Kaisercraft
  • Kaisercraft collection 6 1/2" x 6 1/2" ''
  • Using torn up pages from the book as background sections
  • white cheese cloth
  • Prima flowers and leaves
  • Glass bottle
  • Black sharp for border.
  • Dylusions stamp set 'Quintessential Quotes'
  • Imaginarium Designs Chipboard:
IDDL0015 Lous heart shapes

IDFR0031 Oval Swirly Edge frame

IDS0075 Madison Gates

IDT0027 vine flourish


 My second piece to share is a card that I made for my beautiful daughter whose celebrating her birthday this month. I used a mix of story time ephemera and ID chipboard cogs to represent her 25yrs; growing up from a young child to a beautiful  women who inspires to be a mechanic in the future.


 After spraying the background with the 'circles circles' stencil, I glued down torn sections from an old story time magazine and painted it with gesso to soften it. The chipboard 'Believe' was coated with white gesso with the 'Happy' and '25' being splatted with 3 different Lindy's Stamp Gang ink sprays, I then coated them with a thin layer of glossy accents and sprinkled with Metallic Melts 'Glistening snow' before using a heat gun to melt the Melts. The cogs were covered with 'Pinecone' Versa Color ink and embossed with 'Bronze' Metallic Melts and then glued onto the 'Pinecone' inked 'Piechart' chipboard.

Items I used putting this card together included:
  • Old  children's magazines.
  • White gesso
  • Card stock
  • Kaisercraft 'Letter' stamp
  • White string coloured with LSG ink.
  • Lindy's Stamp Gang ink sprays; Mango mania, Rizzo's rowdy red, Merci Beaucorp Mint
  • Stencilgirl 'circles, circles' stencil
  • White string
  • Black fine Sharpie pen
  • Metallic melts from Tinby 'Bronze', ' Glistening Snow'
  • 'Versa Color' Ink pads 'Silver',' Pinecone'
  • Imaginarium Designs chipboard:
9 clogs on board IDS0018 13x11cm

9 Cogs on board small 6x5cm IDT0004

IDN0001 Numbers 38 per page


IDW0048 Believe
IDD0036 Nat's Piecharts 5 in a board


 IDW0073 You make me happy smile laugh in a board


 My third share is a layout of my Nan and I at my Aunties wedding..a very long time ago..lol.


Using an eyedropper I added Lindy's Stamp Gang ink along the edge and let it drip/moved it around with a well water loaded brush. The butterfly chipboard was simply covered with Silver Versa Color Ink, The birdcage was inked with silver also with embossed with Silver Metallic Melts. The chipboard doily and flourishes were covered with white 'Crackle paint'. Flowers and embellishments were added around the white resin frame with a black inked 'hello' chipboard word extended to go across the page by adding black wire thread.

The items I used on this layout include:
  • Prima Vintage Emporium collection 12" x 12".
  • Kaisercraft, Prima and assorted flowers
  • White and black gesso
  • Silver embellishments
  • Prima resin frame
  • Lindy's Stamp Gang ink- magnolia magenta gold
  • White 'Crackle' medium
  • Versa Color ink pads 'Silver', 'Green Tea', 'Patina'
  • Metallic melts- 'Silver' '
  • White cotton
  • Black wire thread
  • Imaginarium Designs Chipboard:

IDDD0008 Denises Trellis with flourish 1 tiny 2 per board

IDS0009 Bird cage 2 in board.

IDT0014 4 small butterflies

IDT0035 Katie doily 2 in board
IDDD0010 Denise art deco, 2 in board


Thanks for dropping by to check out my latest Imaginarium designs inspiration, I would love to see your creations you make, maybe in some of the wonderful scrapbooking challenges that are in the diverse scrapbooking wide world web in which we are connected in.


www.sandishobbysecrets.blogspot.com.au

Sunday, 15 January 2017

'Be You #happy'- Scrapbooking Top 50 Australia January Quote Challenge.

Hi, welcome to a new year and new challenge over here at Scrapbooking Top 50 Australia. We have some fantastic challenges scheduled for this year and I hope you find the time to join us.

January Quote Challenge- Scrapbooking Top 50 Australia

 Children are amazing.. Just being themselves and sharing the joy in the simple things. This is my grand daughter a couple of years ago the day she discovered we had a swing in the backyard at last.


 This layout was created with the following items:

  • Lindy's Stamp Gang Star burst Color Shot 'Azure Sea Asters' , 'Sea Mint Green' and 'Glory of the Seas Gold'- I sprayed the white 12"x 12" paper with water, sprinkled the powder onto the paper and then resprayed with water. Moving the paper in different directions created the dripples.

  • Using StazOn Black ink I stamped with a Kaisercraft 'Script' stamp.

  • The Imaginarium Designs Chipboard letters that made up the title "Be You" were covered with Multi Matte Medium and Indigo-Blue Mega Flakes 'Autumn'. The Imaginarium Designs Chipboard #Happy was coated with StazOn Black ink.

  • I tied White wire thread into a bundle and dropped some black cotton under the backed photo (Kaisercraft papers and black card) and some Bella diecuts under and on top of the photo as well.


 Here are some closeups:


Thanks for popping over to see my latest creation for Scrapbooking Top 50 Australia and hope I have inspired you to try some new techniques and maybe even join us in our challenges this month and the future.